As I often do with recipes, I have made a few tweaks and changes here and there to streamline the process and tailor the flavor to my family's tastes. I've included step-by-step photos so that this should be doable, even if you've never made bread before.

Note that, while this bread comes together pretty easily, there are two stages and three rises, so be sure to plan accordingly. The Soaker and the sourdough starter (the Biga) must be started either the night before, or early in the morning of the day you intend to bake this. Also, this bread requires either a KitchenAid/stand mixer with a dough hook, or strong arms and a sturdy spoon to mix the dough (although I've never tried it without my trusty KitchenAid).
Whole Wheat Sandwich Bread
Adapted from Cook's Illustrated Magazine
Yield 2 loaves
Biga
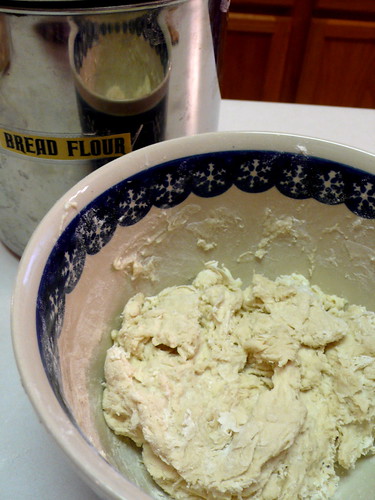
2 cups (11 ounces) bread flour
1 cup (8 ounces) warm water (100-110 degrees)
1/2 tsp instant or rapid-rise yeast
Soaker
3 cups (1 lb, 2.2 ounces) whole-wheat flour (use King Arthur White Whole Wheat if possible for a milder "wheat" flavor)
2 cups (16 ounces ) whole milk
Dough
3 tsps. table salt
2 scant tablespoons yeast
1/4 cup honey
1/2 cup unsalted butter, very soft (room temperature/melted)
1/2 cup bread flour
The day before (or early in the morning):
Combine the ingredients in the biga/sourdough starter and mix until no dry spots remain and it forms a rough dough.
Combine ingredients for the soaker and stir until it becomes a thick dough/paste.
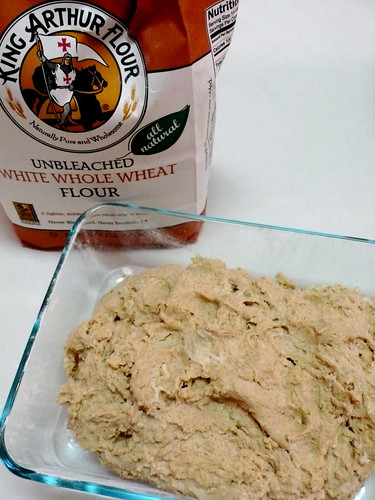
(The bag in the background is what "white whole wheat" looks like. It's not a white flour blend -- it's simply a white colored wheat berry that makes a lighter looking and milder tasting whole wheat flour.)
Cover the biga and soaker (I use a plate on top of each bowl). Place biga on the counter, and the soaker in the refrigerator for 8-24 hours.
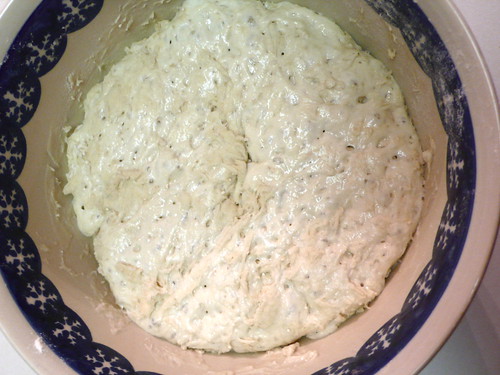
When you are ready to put the dough together, gather your other ingredients, as well as the biga and soaker. Your soaker will have a slightly sour/sulpher smell to it, but don't worry, it's going to taste wonderful once it's all baked. The biga should have gone all bubbly like this:
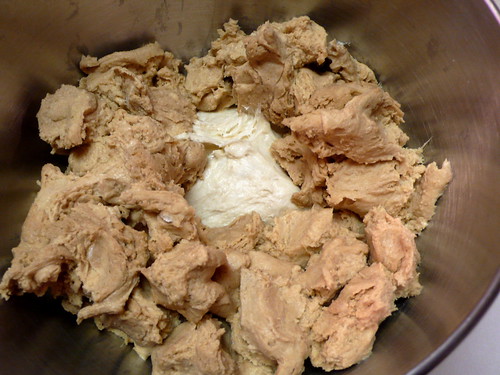
Scrape the biga into a mixing bowl. Break the soaker into smallish pieces and put into the mixing bowl on top of the biga (this helps it mix together much more easily).
Add the salt, yeast, butter and honey, and, using a stand mixer fitted with a dough hook (or a sturdy spoon), beat the dough on low until it all comes together (about 5 minutes) into a cohesive, sticky mass. Add the 1/2 cup of bread flour, and mix on low for another 5 minutes until the dough pulls away from the sides of the bowl and forms an elastic ball around the hook.
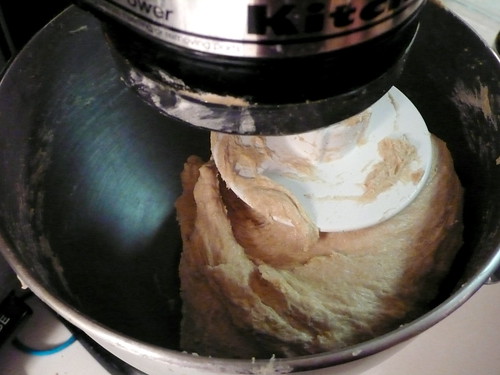
(Yes, my mixer is covered in flour. And no, I did not bother to wipe it down.)
NOTE: if you only want to bake one loaf now and save the other half for later, now is the time to divide it. Cut the dough in half, freeze half of it in a plastic bag, and proceed as follows.
Take the dough out of the bowl to oil it (the bowl). Form dough into a ball by pulling with your fingertips from the bottom of the mass up to the top, like you're stretching a skin over it. Once it is gathered into a ball, place dough back into the oiled bowl.
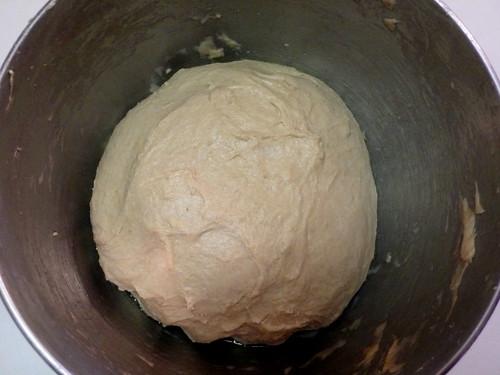
Cover and let it sit in a warm-ish, draft-free area, until it has doubled in size (sometimes 45 minutes, sometimes 2-1/2 hours.) If your dough won't rise, set your oven to the lowest temperature. Once it has heated up, turn it off, turn your oven light on, and put a pan of steaming water in the bottom. Place your dough bowl (covered) on a rack, and let it rise. (My kitchen was ice-cold this morning, so I had to utilize this little trick.)
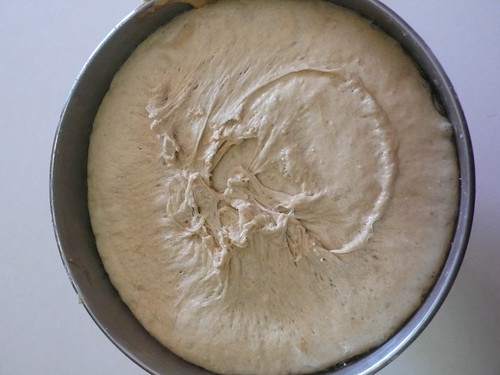
(This was covered with a plate to rise, and the dough rose up to the bottom of the plate, so it bears the marks.)
Once the dough has doubled, use your fingers to fold it like this:
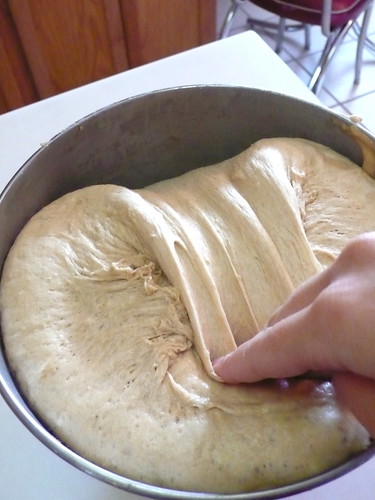
Turn the bowl 45 degrees and repeat.
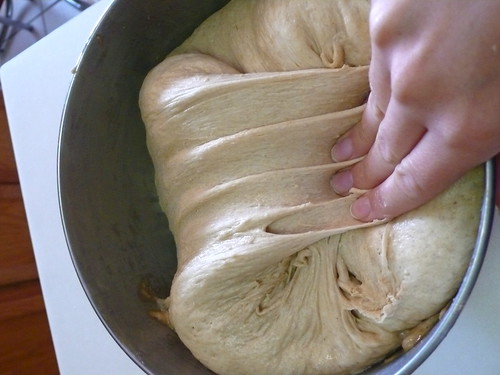
Keep turning the bowl and folding to make a total of 8 folds. Re-cover the bowl, and set aside to rise again (approx. 45 minutes, or until doubled.)
Butter two bread pans.
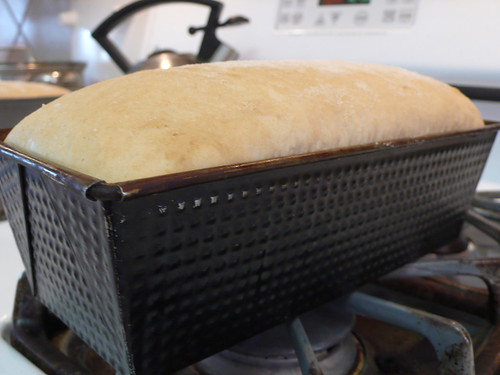
Tip dough out onto a floured counter and cut in half. Roll one half tightly into a cylinder, tucking the ends under, and place in a buttered bread pan. The dough will be a bit unweildy, but don't worry -- just do your best. Repeat with the remaining half. Preheat your oven to 375 degrees.
Allow bread to rise, uncovered, for 30 minutes, until it has risen approx. 1 inch above the bread pan. It should look like this:
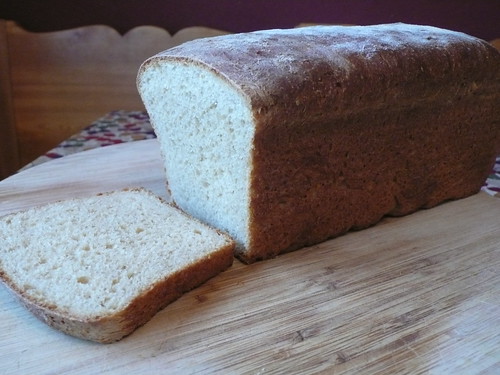
Bake for 35 minutes, or until an instant-read thermometer inserted in the center of the loaf registers at 210 degrees. Immediately tip bread out onto a cooling rack (if bread won't come out easily, let it sit and steam inside pan for about 10 minutes, then try again -- it should come right out.)
Enjoy!
6 comments:
oh, looks soooo goood. i am such a cook's illustrated fan, thanks for the tweaks, I am totally trying this. making bread makes me feel like such a good mama.
The CI recipe suggests one long knife slash in the top just before baking and put a pan of boiling water in a pan below the pizza stone in the oven. It does not appear that you did that--your comments?
You are very observant! When I baked this bread the first 3 or 4 times, I
tried those things. The slashing lead to a fallen, flat, heavy loaf. The
boiling water and pizza stone seemed to have absolutely no effect on the
bread. I've been doing it without all of that now, and am much happier with
my bread, and the more streamlined method. :-)
Thanks Faith--I am going to give use your method next time
Jerry
What is your defrosting technique? I made the bread this weekend, and now I'm wondering how best to defrost the bread I've stashed in the freezer :-)
I don't often freeze my bread, so I'm not sure. I would guess that if you put it on the counter inside of a mostly closed plastic bag, that would probably work the best? Let me know what you end up doing and how it works for you! :-)
~Faith
Post a Comment