Monday, May 31, 2010

More sewing and some randome link-happiness

Tomorrow is the last day of school for my boys.  I'm ashamed to say that I did not put together any sort of gift for Teacher's Appreciation Week, so instead we're putting together End Of The Year gifts.  I've got 4 loaves of bread baked/baking, note-card sets the boys personalized, and box bags. 

I cut the box bag fabric out last night so that it would make for easy sewing today:


Also in sewing news, here's a little pillowcase dress and bonnet set that I made for a friend's birthday (given to her yesterday):


I've also got a batch of Dorie Greenspan's Peanut Butter Chocolate Chip Oatmeal Cookie (recipe from Baking: from my home to yours -- of course!) batter chilling up to bake later on today...just because I was craving peanut butter something.  In fact, I might make something that needs to be dipped in some sort of spicy peanut sauce for dinner.  Not sure what, but I'm sure I'll think of something.

Random linktastic-ness:
  • I've emailed the pattern PDF for the Mendocino Dress to my nearest Kinkos which I'll pick up tomorrow.  I need to get started on summer dresses for myself!  It's been 90+, and I feel like I might die from the heat.
  • After listening to the latest Spilled Milk podcast, I have the urgent need to eat some Onigiri (rice balls).  It'll certainly be on our household menu soon...
  • This gathered clutch by Noodlehead has hit the top of my short-list of "selfish" sewing projects.
  • A virtual treasure trove of adorable (free!) downloads at Creature Comforts.
  • I need to make this Greek Yogurt and Honey Pie.  SOON.
  • For those of you who have been wanting to sew some little girl dresses but are a little bit intimidated, you can buy kits at Little Fish In A Big Pond.
  • Make your own Mustard (why do I feel so inspired by this sort of thing?)  :)
  • A cute, ruffled petticoat skirt that I need to make for myself!

Thursday, May 27, 2010

What I SHOULD be doing, and what I AM doing

Things I should be doing:

  • Tidying my studio
  • Completing several sewing projects in afore-mentioned studio (which I cannot do until it is tidy)
  • Scrub both of my bathrooms
  • Sweep and mop the kitchen floor
  • Vacuum house
  • Decide what I'm making for dinner
  • Prep dinner so that I won't have so much to do in the afternoon after my boys are home from school

Things that I AM doing:
  • Blogging
  • Trying to figure out what exactly happened in the season finale of LOST, and if the producers actually intended for there to be holes all through the logic of the storyline, supernatural or not
  • Reading to Daisy (at least this is productive)
  • Doing laundry (also productive)
  • Dishes (hey!  I'm being productive!!)


Discouragingly, even if I wanted to procrastinate from all of this by knitting, I've hit a wall there:


After finishing the body and one of the arms of Estelle, I attached the final skein of yarn...only to realize...


Yes, the LAST SKEIN doesn't match the other in the least.  Love it when that happens.  So.  I need to rip the one completed arm out and then re-knit both arms at once, alternating between "good" and "bad" skeins.  BLAH.  I'm tempted to throw it in a stash box and forget about it for a while, but I'm soooo close to finishing it... (and no, it was waaay too long ago that I purchased this from Loopy Ewe to see if they have another of the specified dyelot, and anyway I don't feel like trying that hard.  I just want to complain.)

I don't have anything else on the needles at the moment.  Well, OK, I do still have the Auburn Camp Shirt marinating in a basket near my stash, but that would take some thought to get back into, so that's out for now.

On a brighter note, this is what I did with that little songbird embroidery piece:


This pattern, once again, is from the book Doodle Stitching (fromt he Songbird Wristlett pattern).


The pillow pattern itself is sort of a spin-off from the Embroidery Lady one I did from Handmade Home.  I love how cute they look together!


Once again, Amy Butler fabric mixed with a bright red vintage scraps.


OK, I think I'm done procrastinating now.  Back to my to-do list for the day!

Sunday, May 23, 2010

Just can't stop the stitching...

Birdhill has been stitched, washed and pressed.


Now that I've completed this one, I'm even more crazy about Aimee Ray/little dear designs than before.  I've purchased three more: Happy Garden, Hill Man, and Thinking.  I'll either be using this series to stretch over canvases and put up on the wall, or as panels in...a quilt.  Yes, my friends, you knew that quilting couldn't be too far behind with all of this sewing and embroidery, didn't you?

We've been needing another blanket for the living room for a while now -- I knit the Hemlock Ring/Storytime Blanket a while ago, and that is pressed into use often, but I would really like to have a lightweight, large quilt to keep folded over the back of the couch for chilly winter evenings (because, you know, it's just SOOO cold here in Texas.  DON'T TRY TO DISSUADE ME!)  So anyway, those are my thoughts.  We'll see what happens.  For now, I'm just happily stitching.

Currently in my 6x6 Q-Snap Frame:


This is the design from the Songbird Wristlet in Aimee's book Doodle Stitching.  It will be applequed onto another pillow for the couch.  It's stitched on a square of fabric cut from the same thrifted tablecloth I used for my other redwork pillow.

Friday, May 21, 2010

Coconut Custard Pie

Quite a while ago, I promised the recipe to my Aunt Terry's Coconut Custard Pie...and then promtly forgot all about it, just as I knew I would.  I'm nothing if not consistant.  ANYWAY, I'm remembering it now, so here we go!


The flaky crust of this pie contains a cool creamy-smooth milk custard, shot through with chewy shreds of coconut.  It's one of those fabulous desserts that you could bring with you to any event, and no one would ever be able to guess how little time it took you to put it together.  This recipe utilizes a rather un-fussy crust that manages to turn out flaky and delicous no matter how many little hands want to help you pat it into place.  You do not need to pre-bake the crust, and the custard sets up in the oven, so there is no special care needed with that part of it either.

This does require at least a 3 hour chill once it's done baking, so be sure to plan that into your prep time.


Aunt Terry's Coconut Custard Pie

3 cups milk
6-3/4 Tablespoons sugar
3 eggs, beaten
1/4 teaspoon vanilla
1/2 cup shredded coconut (sweetened or not)
extra 1/2 to 2/3 cups shredded coconut for sprinkling on top

Scald milk (bring just up to a simmer and remove from heat).  Add sugar.  Allow to cool a bit while you prepare the eggs.  Beat eggs 'till pale and foamy.  Combine eggs and milk gradually by alternating between putting milk in egg, then egg in milk, whisking all the time.  Add coconut.

Pour into unbaked oil piecrust (recipe below).  Bake at 400°for 45-55 minutes.  During the last 5 minutes, sprinkle the rest of coconut on top to brown.

Chill at least 3 hours and serve (with whipped cream or without).


Oil Piecrust
(This crust is best for "one crust" pies, like the one above.  Very crumbly, flaky and fragile once it's baked.)

1-1/2 cups flour
1 Tablespoon sugar
1/4 teaspoon salt
1/2 cup vegetable oil
2 Tablespoons milk

Mix together milk and oil in measuring cup.  Mix together flour, sugar and salt in pie plate.  Make well in flour mixture.  Add oil and milk.  Mix with fingers and pat into pie plate.  (You don't have to worry too much about overworking this dough, but it's always a good idea to try to mix it as little as possible to combine it.)


Thank you Aunt Terry for your permission to share your recipe!  :)

Thursday, May 20, 2010

Roasted Italian Sausages and Potatoes

When it's hot outside, the last thing I want to think about is what to make for dinner.  The heat kind of makes my stomach shut down, and I could seriously just live off of salad for the entirety of the summer (or here in Texas -- spring, summer and autumn).  However, I have a whole passel of mouths to feed, so when I strike upon something that's quick to make and everyone likes it, I call that a Big Success.  The only drawback of the following recipe is that it does implement the oven, which will heat up your (possibly already sweltering) house.  The upside is that you get to eat deliciously oven-roasted sausage and vegetables, browned and crisp about the edges, infused with rosemary, and doused in olive oil.  It's simple enough for a weeknight dinner, but tasty enough to feed to guests.  Heat or no heat, this is fast becoming a staple in my quick-and-easy dinner file.

1 lb sweet (or hot, or a combination of both) Italian sausages cut into large chunks
2  green (or red or yellow) sweet bell peppers cut into large chunks (you could also substitute poblano chiles for a little bit of a spicy kick)
4 large red potatoes (or 6 medium, or however many you want!) cut into large chunks
2 yellow onions cut into at least 8 wedges
palm-full of fresh rosemary, minced
extra virgin olive oil
sea salt
a dash of crushed red pepper (optional)

Combine the sausages, peppers, potatoes and onions in a large, sided baking pan or casserole dish.  Drizzle with olive oil, add rosemary, and shake salt over all (and crushed red pepper if using).  Toss to combine.


Bake at 450°for 30 to 40 minutes until golden and sizzling.


Serve with rosemary olive oil dinner rolls, rice, corn muffins, and/or a big fresh green salad.

Wednesday, May 19, 2010

"Birdhill" beginnings

Daisy is still kind of sick today, but at least she's able to nap.  It would be terribly miserable if she was hyper-sick.  That's just terrible.  She hasn't thrown up since last night, and she actually got some Rice Krispies down this morning, so it seems like things are looking up a bit.  She's sleeping in the playroom at the moment, Billy is napping in his crib, and the house is peaceful and breezy.  Sometimes moments like this feel like the eye of the storm, but I savor them anyway.

I'm setting up for my next embroidery project:


I taped the fabric securely to the table.  Transfer paper (from Sublime Stitching) is sandwiched between the fabric and the printed out design "Birdhill" (by Aimee Ray from her Etsy shop Little Dear).  I used a ballpoint tracing stylus (also from Sublime Stitching) to trace over the image, transferring it to the fabric beneath.


The transferred design "hooped" (or should I say "q-ed"?) in a Q-Snap Frame.


My chosen color palette.


I haven't decided if this will be a wall hanging, appliqued on a small quilt, or another throw pillow, but I've been in love with this adorable design since the minute I first laid eyes on it!

Tuesday, May 18, 2010

LOST projects: the productivity of my unproductive week

Daisy has been either throwing up or lying on the couch with a fever all day.  So sad.


I hate it when my children are sick, because I feel so helpless.  Hopefully she'll be better in the morning.

In the meantime, here are the things I was working on while watching marathons of LOST Season 5 for the past 2 weeks:


Into The Woods Spectrum Batt from Purldrop Studio


Alpine Meadow Art Batt from Purldrop Studio


My Deep Dark Purple (Very) Blended Batt from Purldrop Studio

That last one was both spun and plied on a spindle, and the singles were laceweight.  After a good many hours spinning the same color purple, I started to feel like it was The Project That Would Never End.  Then it occurred to me that really the only Projects That Never End are the ones that are never worked on.  So I took it outside with me while I waited for Max's bus in the afternoons, I spun while watching episodes of LOST, I spun between breaks in the action while cooking dinner....it took up residency on the upper counter in my kitchen, and I tried to give it a little go any time I thought of it.  And at last, I was done!


The last cop of singles on my Lignum Vitea Golding spindle


The singles


2-strand plying ball


Plied up on my purple turnip supported spindle.  This took ALL DAY.  NOTE TO SELF: ply fine stuff on wheel.  OR YOU WILL HATE.  And my mom taught me not to hate.


This last picture looks almost obscene to me...maybe I'm just feeling s*xually repressed, but seriously, that's where my mind goes, immediately.  I'm a 12-year-old child trapped in a 30-year-old body.  Scary times.

This project was especially important to me, because the batt contained the last bits of natural black alpaca from the chunk of fiber my friend Sharon gave me when she first taught me to spin on a toy-wheel spindle 4 years ago. (WOW that was a complicated sentence.  I'm not even sure I can untangle that one.)  I clumsily spun most of it in that first weekend of my Spinning Life, but saved back a wee bit for when I could utilize it in a more skillful way once I'd gotten "good".  Last year I carded it together with some purple Corrie or Merino (can't remember now), and a big pinch of purple glitz, and have just now gotten around to spinning it.

I also did quite a bit of mindless knitting on my Red Wine Cardi (Estelle).


This color doesn't even begin to represent the deep wine of the actual sweater, but ah well, it's just a WIP pic.

My friend Jillian gave me these precious little cupcake stitch markers for my birthday, and they made me smile as I knit back and forth across them:


I've got a few more inches of the body, and then on to the arms!

I also finished another pair of socks for my mom (not photographed yet), and taught myself the Coreless Core Spinning technique by Jazzturtle using a Three Ring Circus Spontaneous Spinning Cloud (WOAH LONG NAME!) from Loop.


It's fun, and I prefer it to traditional corespinning (wait -- is ANY corespinning considered traditional?  Must think on that one.  Okay, thinking's done, and nevermindI'montosomethingelse.  HEY! Shiny!!)  It's a tiny bit fussy at the beginning, but now that I'm getting used to it, I really like it.  YAY corespun!

So...I suppose I really did get stuff done during my two weeks of NOTGETTINGANYTHINGDONE.  I just didn't show any initiative with the things that actually NEEDED to get done.  But who needs to be practical all the time?  NOT ME!  Although the guilt of just letting go was kind of difficult to take...

Monday, May 17, 2010

A banner, a pillow, and a very happy Monday

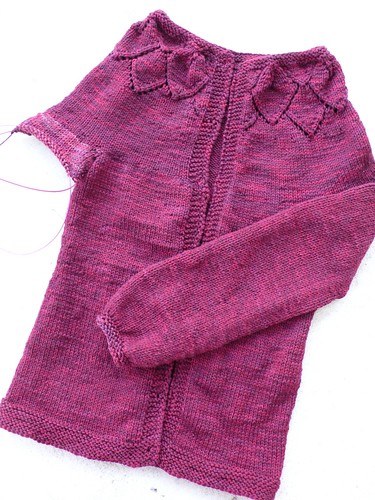
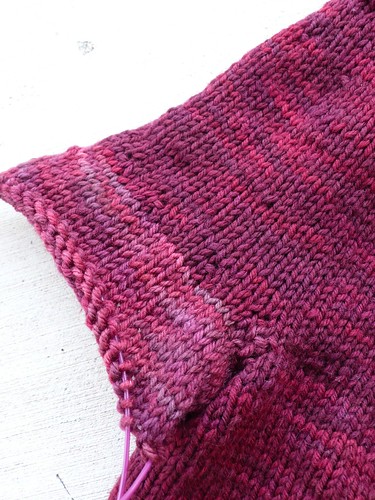
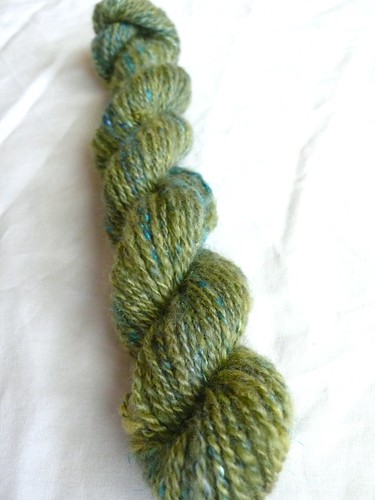
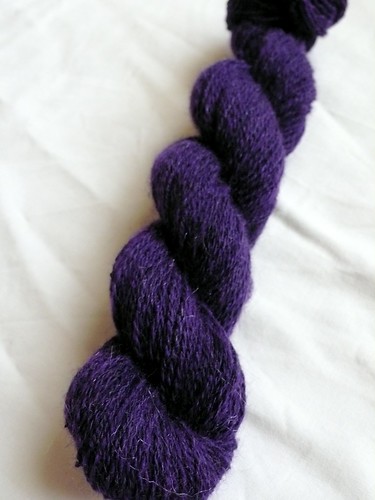
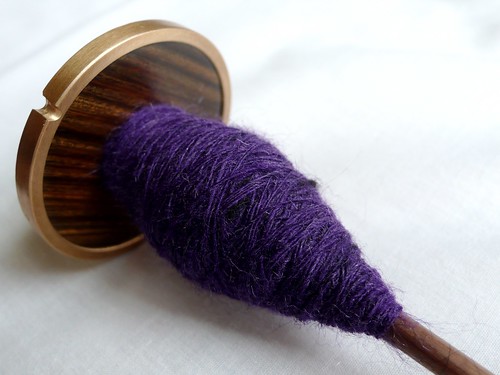
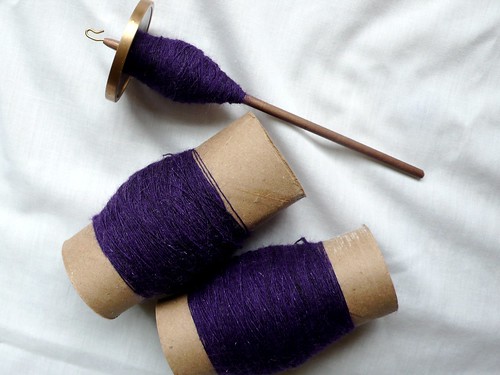
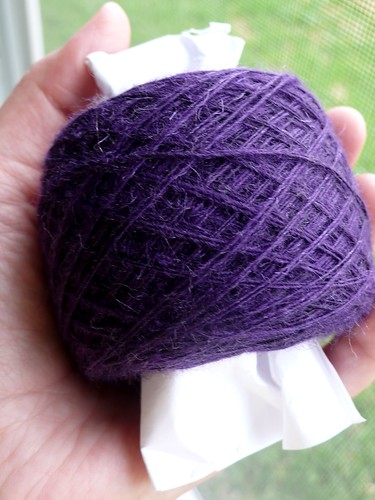
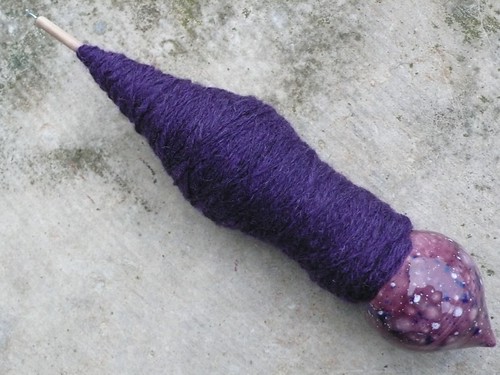
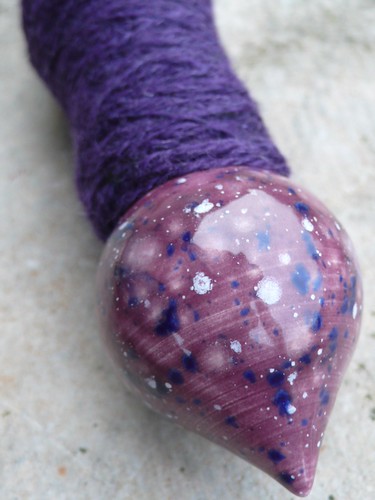
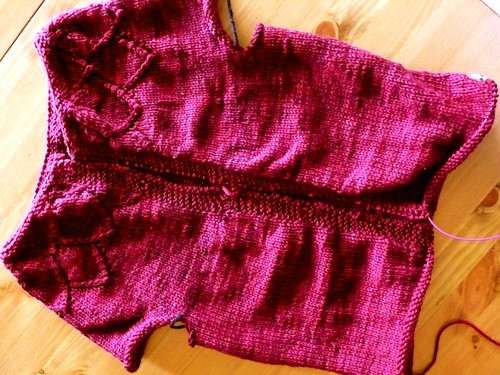
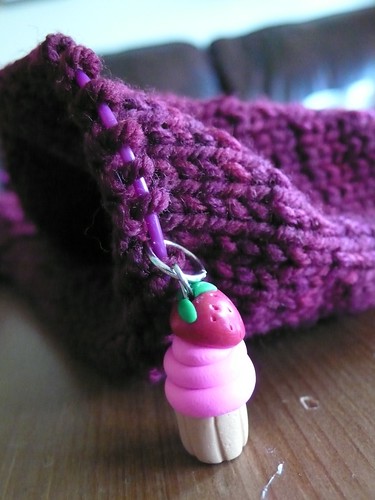
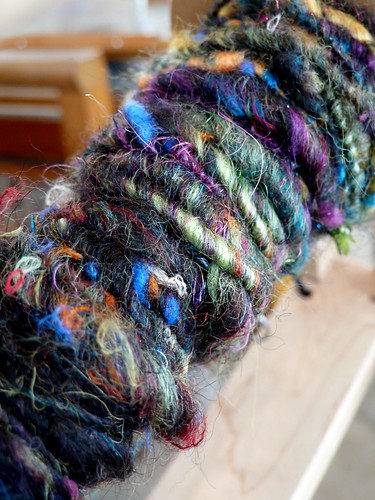
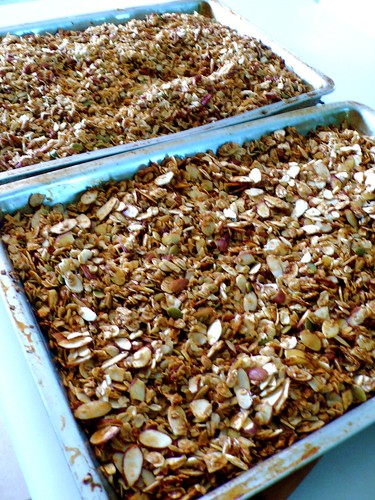
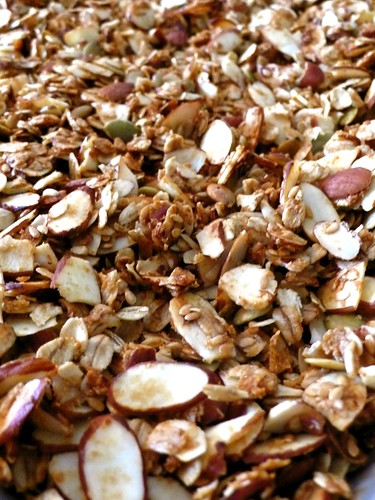
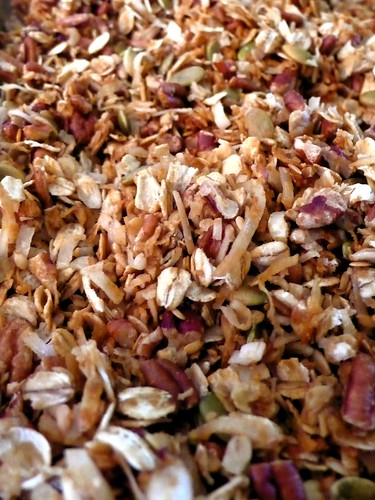
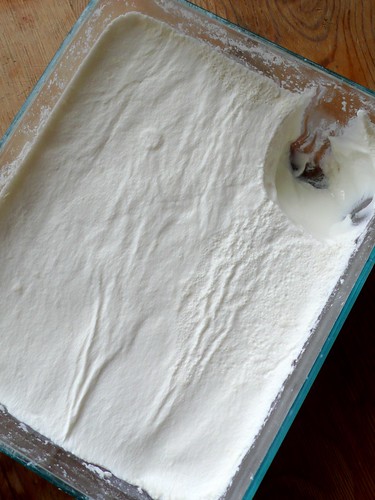
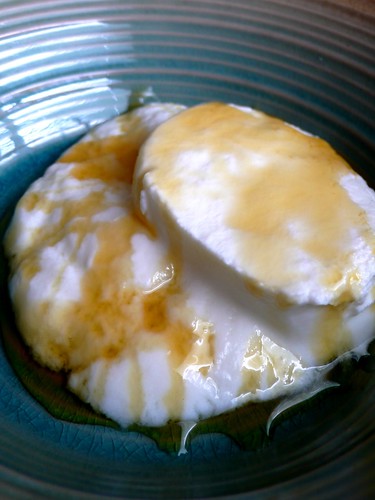
So.  Greg is finally done with his two weeks of night-shift work, and I am breathing a huge sigh of relief. As I geared up for his nocturnal schedule, I imagined myself bustling with industrious activity in the evenings -- carding up a shop update, sewing some clothing for myself, working on some projects that I've been planning to start (including a baby shower gift that I just could not decide on, so therefore couldn't cut the fabric to begin)...but instead, I allowed myself to be listless.  I mean, I still baked bread and muffins and granola and made yogurt for my children's breakfast and made dinner every night and spun and knit some...but I didn't bustle.  The housecleaning went to shambles, I was less-than-patient with my children, frustrated with Greg for having this schedule (which is SO not his fault, but, you know, there's gotta be a fall guy...) my workshop/studio stood unused, I stayed up way too late at night (trying to catch up to the current season of LOST on the free episode feature on ABC.com), and slogged through my mornings.  I felt as though I was just wasting time, dragging my feet through each day.  Looking back, I think a lot of it was just my attitude towards it all -- I was still very busy, but just busy with different things than I wanted to be doing.  ANYWAY!  Moving onward, let's look back at some projects I finished a few weeks before the Night Shift Ate My Life.

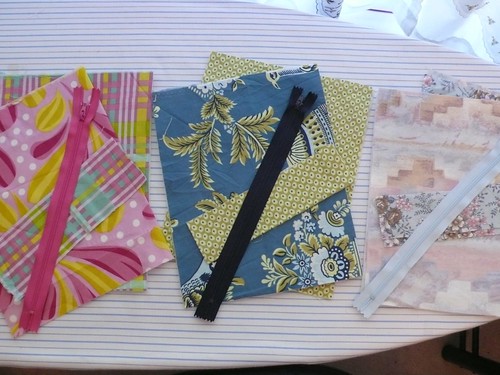
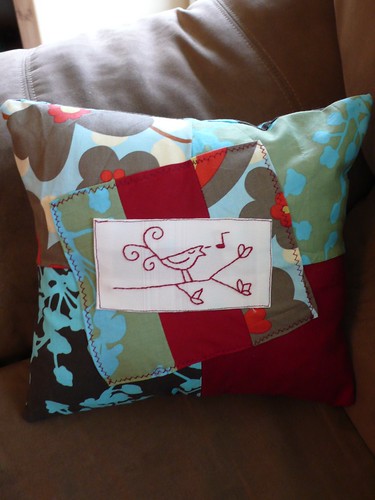
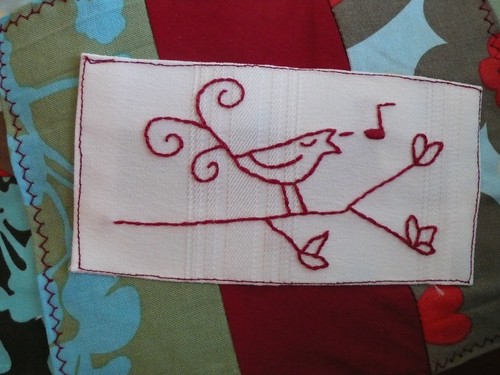
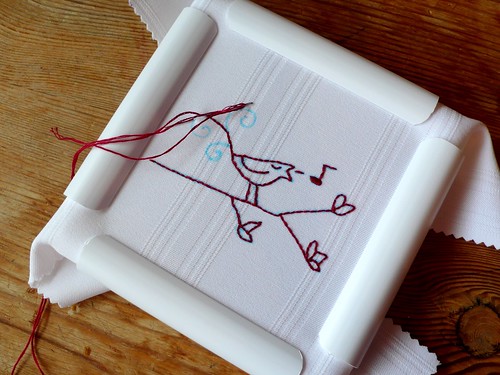
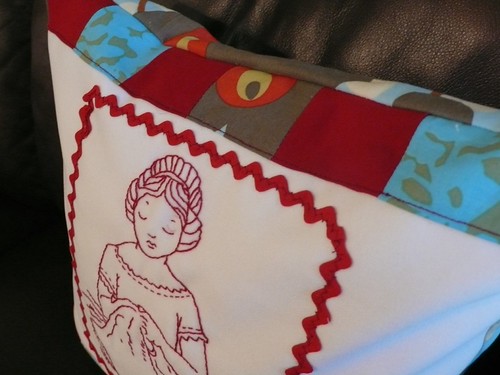
First, remember that sweet bit of 
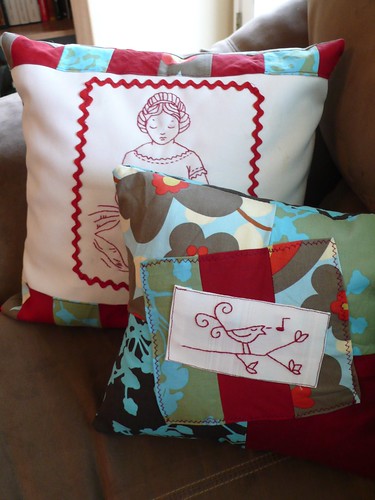
redwork embroidery I was working on a while back?  When it was completed, it grew up to be this throw-pillow:


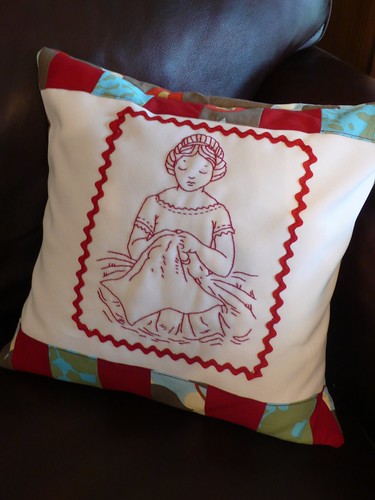
This pillow is based upon the one in Handmade Home by Amanda Blake Soule (Soule Mama).  Greg didn't think it went with the aesthetic of our living room, but I think it looks rather at home here.


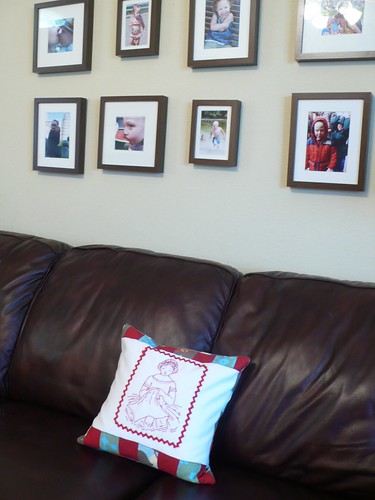
The fabric used here is a mixture of Amy Butler and some vintage scraps I had in my stash.


The redwork pattern can be found free on PatternBee.


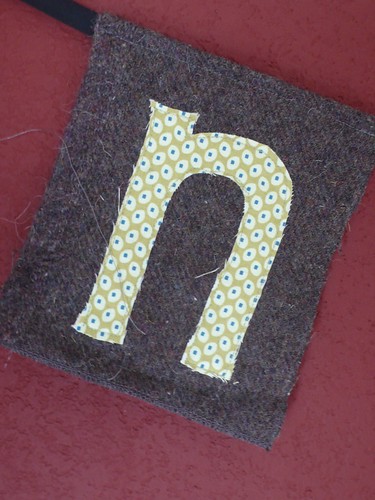
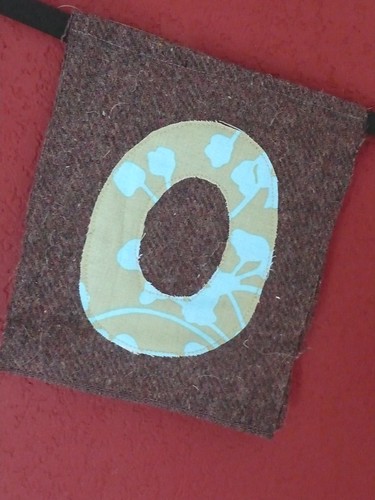
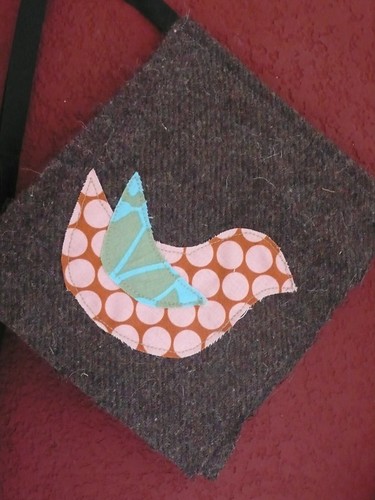
This next project is a bunting/banner that I've wanted to do ever since I saw the cover of Handmade Home:


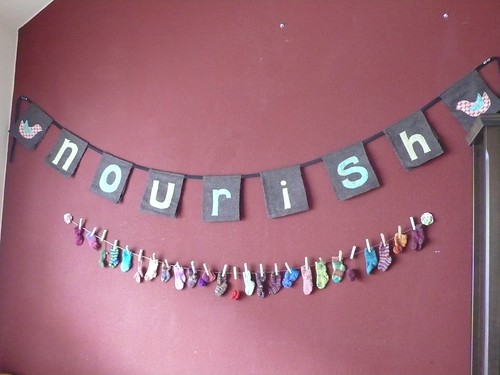
As you can see, I still haven't taken my little sock/mitten/hat "advent" clothesline down since Christmas, and, after polling the members of my little family, we've decided that it's simply a part of our kitchen now, and no one wants to see it gone.  So it needed a friend.  And I think that this One Word Banner complements it perfectly, helping to pull the whole look of the kitchen together.


I alternated these two Amy Butler fabrics for the letters, and the background "flags" are from an old British gray wool military blanket:


The little birds at each side are my favorite part:


Coming up with the word for the banner was difficult, because whatever it is makes such a statement, but when I finally hit upon "Nourish", it felt right.  Nourishing is what we're all about -- feeding little bodies, souls, caring for the 4 tiny lives that we've been entrusted with.  I love having the reminder up there on the wall where I can see it all through my day.

Upcoming projects for our house include a tiny embroidered "notepad" quilt (inspired by this one), a magnetic photo board (from Seams To Me by Anna Maria Horner), and I also plan on picking up a small blackboard at Ikea to hang on the wall.

Because Greg is in the Army, every place we've lived has always been temporary, so I have never felt the urge to stamp it with my own design aesthetic, or dig in with the nesting urges.  I've always left the decorating to Greg, which has meant lots of colored lights, walls papered with rock band posters, and a serious rock-and-roll asthetic, which can be cool to look at...but wasn't me.  Yes, we do share this house, and I want him to be happy with the way our living space looks, but when he deployed last time when we were living in Germany, I started to realize that I really needed our house to feel like my domain.  I'm the one who generally entertains here, I'm the one who spends most of my waking hours here, I'm the one who dreams and creates and conducts life from this space.


Something about this place we're living in now just feels so Home to me -- I feel more at home here than I ever have anywhere else, and now that I've started to personalize our living space, I've found it so deeply satisfying.  I love seeing the fruits of my own creative process on the walls, brightening our rooms, and expressing who we are as a family.  I also love that, through all of this feathering of our nest, we can divorce ourselves (for the most part) from storebought consumerism in this small way.

Our house may have been built in a cookie cutter assembly-line style, but the inside reflects the values we are raising our children with.  It's empowering in ways that I'd never thought of before.  Is it possible to develop an addiction to interior decorating?

This past weekend Greg and I scrubbed the house down, spent much needed time together, and I feel refreshed.  Now, looking back at these two projects, I feel newly inspired to hit the ground running.  I can feel a good week coming on.  Happy Monday, my friends!

Wednesday, May 12, 2010

Sweet-Salty Granola

This recipe is adapted from Uncle Austin's Granola.  This is a somewhat lower fat version (cutting down a bit on the nuts and coconut), and I've also basically halved the recipe so that you end up with enough to feed a medium sized family for a week or so, but not the Military Mess Hall proportions of the original recipe.  :)

This granola is toasty, nutty, sweet, and a bit salty -- just perfect for eating sprinkled over a big spoonful of plain yogurt, dry by the handful, or generously doused in milk.  It's not a low fat food, but pretty much all of the fats in here are the good kind that are good for you heart.  So eat in moderation and enjoy!!


Feel free to riff on this recipe as you feel fit -- substitute or add extra seeds and nuts, swap out maple syrup (grade B dark amber is the most flavorful for cooking, but even a floral light amber is delicious), honey, barley malt agave nectar or brown sugar for the molasses, and feel free to add whatever sort of dried fruit or chopped chocolate once it's cooled.  The nonfat dry milk, combined with the vanilla extract give a welcome creamy note, but if you don't have dry milk on hand, no worries -- you can do without.  In short: make it your own!  I certainly have.  :)


Salty-Sweet Granola
(Adapted from Homesick Texan)

Ingredients:
5 cups rolled oats
¼ cup pumpkin seeds
¼ cup sunflower seeds
¼ cup golden flax seeds (or regular, but I prefer the mildness of the golden ones)
2 cups nuts (I usually use almonds or pecans)
2 cups shredded coconut (preferably unsweetened)
½ cup nonfat dry milk
1-½ tsp salt
1-½ tsp vanilla
½ cup vegetable, peanut, or mild olive oil (I've even used extra virgin olive oil in a pinch and it was fine)
½ cup molasses
1 cup dried fruit, chopped chocolate or chocolate chips (optional -- to be added after granola is baked and cooled)

Preheat oven to 300°.

Combine all of the dry ingredients thoroughly in a bowl (I split the recipe in two, adding coconut and pecans to one half, and almonds to the other, to suit our household's varying tastes.)  I like to toss it with my hands to make sure it's truly mixed.  Put vanilla, oil and molasses to a small bowl and mix vigorously with a fork to fully combine.  Pour over dry ingredients and mix well (once again I use my hands for this to make sure it's really combined and everything has been fully coated with the sweet mixture).

Spread in two jelly-roll pans or cookie pans with sides.  Bake for 10 minutes, stir, and then bake for 5 more minutes or until lightly golden.

Remove pans to cooling racks, and stir occasionally to assist in the cooling process and keep it from clumping too much.  When the granola is perfectly cool, add the dried fruit and/or chocolate, and transfer to a lidded glass or plastic bowl.


With almonds -- Greg's favorite


With pecans and coconut -- the way I like it

Store in a cool dry place for up to 10 days, and enjoy!

Tuesday, May 11, 2010

Super simple handmade Greek Yogurt

I've been wanting to make yogurt for a few years now, but it's always kind of intimidated me.  I thought that there was all sorts of (probably expensive) equipment needed, that I'd have to mail-order a special yogurt culture starter, etc., and all of my online research verified this.  It was going to be an expensive and daunting task, so I put it off and kind of forgot about it.

A few days ago, I found the recipe for a very simple version of homemade yogurt on the blog JCasa. It uses only two ingredients, and if you own a pot, you have all of the equipment that you need.  Encouraged, I decided to take the plunge, and -- it worked!  The following is my slightly streamlined version of the already very simple recipe found there.


Thick, creamy Greek Yogurt -- oh my!


For the lactose intolerant among you, I've been told that you can culture this for 24 hours instead of the 8 I have here, and the yogurt culture digests all of the lactose for you, rendering it safe.  I haven't tried this yet, so tell me if you do!


Generously drizzled with Lyle's Golden Syrup

One last note -- not only is this stuff delicious and crazy simple to make, but it's also cheaper than buying yogurt at the store.  Yogurt generally costs 50 to 80 cents for 6 to 8 oz (regular or organic).  This, on the other hand, worked out to about 45 cents when using organic milk.  You could make it even more cheaply if you used regular milk -- or even powdered milk if your budget is really tight.)  I plan to try this next week with raw milk from the local dairy for cream-on-top yogurt.

Greek Yogurt
(Adapted from JCasa)

Ingredients:
1/2 gallon milk
6 or 8 oz of plain yogurt

Pour all of the milk into a large pot.  Do not cover, because if you do, it will most likely boil over before you notice it.  Bring your milk just up to a simmer (a skin should form), but do not boil.  Allow to cool down to the point where you can stick your finger in for a 10-count, before it begins to burn you (for those of you who feel they just HAVE to use a thermometer, you're aiming for about 116°).  This will take at least 20 minutes in a warm-ish kitchen.

Dump the yogurt in and whisk thoroughly to incorperate.  Pour the mixture into a large lidded glass or plastic bowl, cover, and wrap in 5 or 6 kitchen dish-towels.  Set out on the counter overnight or for 8 hours.

Check to see that it has "set".  If it looks like yogurt, congratulations!  Success!!  If you want it to be greek yogurt, pour your new yogurt into a sieve that has been lined with two layers of cheesecloth, and set over a bowl.  Allow to drain for several hours in the refrigerator until it is as firm and creamy as you wish.  Turn your yogurt back out into the bowl and seal with a lid to store in the refrigerator.  (Alternately, lay paper towels over the surface of the yogurt to absorb the liquid, and change them out frequently until the yogurt firms up the way you want it.)


Be sure to save 1 cup of plain yogurt as the starter for your next batch.

Sprinkle with granola, stir jam into it, dress it with maple syrup, honey, Lyle's Golden Syrup, or dollop a spoonful plain into some spicy indian curry.  Alternately, you can add some vanilla extract and sugar or other sweetener to the entire bowl and mix well.


This yogurt has been 100% Daisy Approved


Truly, I cannot believe how easy this was to make.  So what are you waiting for?  Go make some yourself!

LinkWithin

Related Posts Plugin for WordPress, Blogger...