Reading time. For my little ones, it's one of their very favorite times of the day. Snuggled right up against me, reading their favorite stories.
The only trouble is, as much as I love this special time, some days I feel like I just can't bear to read through "The Very Hungry Caterpillar", "Brown Bear Brown Bear", or "The Snowy Day" one more time. Those three are quality books with richly drawn/painted illustrations and fun storylines. But there must be more out there!
Last week, we set out to the library with one goal: to find Non Fluff children's books (i.e.: ones that look like they took about 2 seconds to write and illustrate; ones that include licenced cartoon characters; ones that seem to be devoid of all character). With help from the very patient children's librarian, we went home with a nice fat stack of books, and now storytime has been refreshed!
So. I figure that if I've been looking for this sort of children's books, you might be too. I'll be doing occasional, brief reviews on some quality books we've found especially enjoyable. If you have children's books that you love as well, please share in the comments, or link to your own blog post about it!
Bedtime for Frances:
Frances is a little badger who just can't seem to fall asleep. Through a funny and clever dialogue and pencil/watercolor illustrations, our children learn how to have self control along with Frances and stay in bed, even if they are not sleepy.
A Baby Sister for Frances:
When I was little, I used to check the vinyl audiobook version to listen to on my mom's old turntable, and it was my absolute favorite. Maybe it had to do with the fact that I was the oldest of a growing number of little brothers and sisters, but this book was always a gentle, comforting reminder that I would never be replaced.
Fanny:
All that Fanny wants in life is to have a Barbie-esque doll, but her mother refuses, feeling that it is "a bit too much for a little girl". Throughout the storyline, Fanny decides to handmake her own doll, and learns how much more special it is to have something that is made by hand.
Fanny & Annabelle:
Fanny finds some money outside and learns the importance of honesty and having a clear conscience as she works through the moral trouble of what to do by writing an adventure book starring her doll.
Pancakes, Pancakes:
This book was a little hard to follow for my younger two, but Sparky and Max really enjoyed it. The story takes the reader through the journey of food, farm-to-table, and creates an appreciation for what we have in our pantry, and how it got there in the first place.
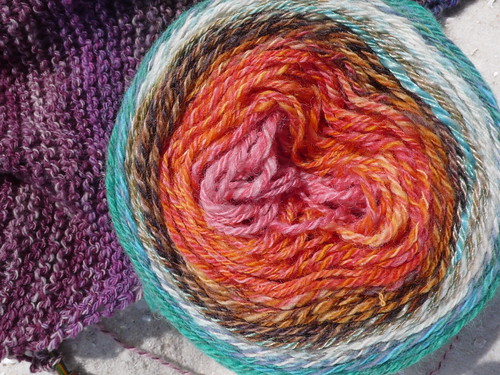
Tomorrow: pictures of some spinning I've been doing! I'm not sure I've ever spun 2 lbs of the same colorway before, so hear the story and see what I've been up to at the beginning of tomorrow's Link-tastic Friday!
Thursday, March 31, 2011
Wednesday, March 30, 2011
What I Wore Wednesday: Western Inspired
Attention to family who might be reading: yes, my birthday is indeed coming up (on Easter this year!), and if you would like to find the perfect birthday gift for me, please look no further than my Modcloth wishlist. Or a Modcloth gift certificate. Either would be swell. Thanks a bunch. :-)
When I was in my teens, I used to regularly comb thrift stores and vintage shops for my wardrobe, sift through bags of hand-me-downs from church ladies who were cleaning our their closets... It was born out of necessity; for the most part, the only money I had to work with was the few dollars I'd make here and there by babysitting. (This totally dates me, but this was back when $1 an hour per child was kind of a lot to ask -- or at least in my neighborhood.) However, the more I shopped (often altering the fit with my mom's old sewing machine), the more I developed my own unique style...and I started to really enjoy the way that I could put an outfit together that no one else could possibly copy. (My sisters might argue that no one would WANT to copy it, but that's another story for another day.)
When I first became pregnant with Sparky, and my body started the amazing shape-shifting, my vintage clothing collection got pushed aside for more practical maternity wear. In fact, that's when Greg bought me my sewing machine, and I sewed a bunch of maternity pants and tops for myself (the first time I'd ever sewn fully garments -- start to finish -- on my own without my mom).
Since then, my vintage wardrobe has moved with us -- state to state, internationally -- virtually undisturbed on their hangers. It is only now that I am finally cracking open the closet door to dust off my favorite finds from years ago.
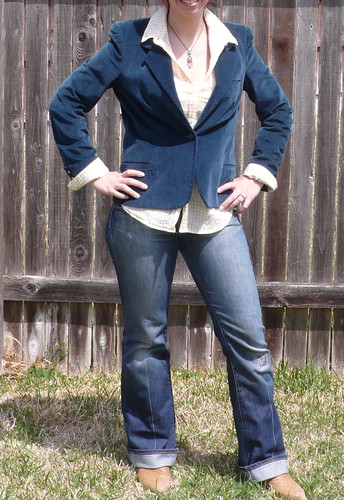
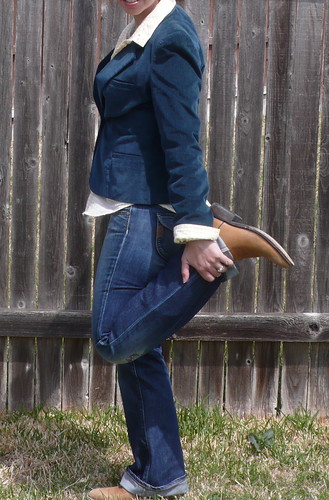
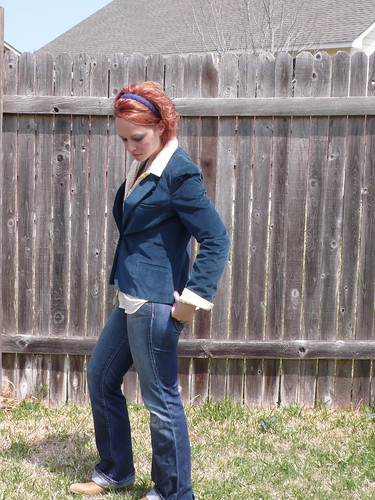
The vintage piece I'm wearing here is a corduroy blazer. I'm amazed that I can finally fasten the button again!
Headband, Goody ~ Blazer, vintage ~ Western Buffalo Check Button-down, OldNavy ~ Jeans, Paige Denim "Pico" ~ Boots, Frye "Billy Vintage Pull-on"
Looking through my old finds reminds me of the treasure hunts I used to conduct through my grandma's closet (indeed, I still have several of the amazing polyester shirts that I scored from her house!)
It totally got washed out by the sun in these pics, but the shirt is a lemony yellow -- I am so in love with yellow this spring!
I'm inspired to start thrifting once again. So often, if I want a new item of clothing, I feel too impatient to actually search for it on the racks of Goodwill, and instead just pick up something brand new (and often devoid of character) at a retail chain shop. (Like OldNavy.) (OK, so pretty much ALWAYS OldNavy.)
But the thrill of finding just that special something, the excitement of the unexpected, the yards of fabric posing as old sheets and tablecloths, begging to be re-purposed as dresses and skirts...ahh for more hours in my day.
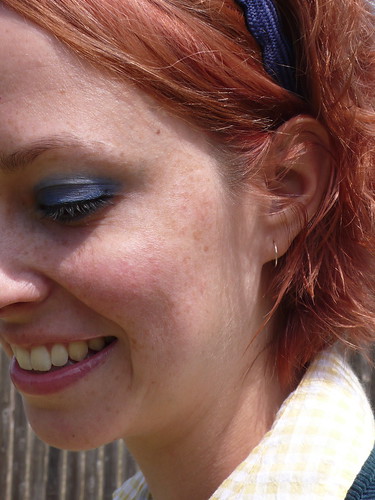
I love the look of really dark, intense eye makeup with a clear, ultra shiny lip gloss. If only I wasn't so bad at taking makeup detail shots...
I never made a list of New Year's Resolutions, but who says that we can't just make up some Springtime Resolutions instead? Here we go:
So tell me: I know that a lot of you thrift and bargain shop at flea markets and garage sales. What is your very favorite find (clothing, furniture, ceramics, misc.)? What gets the most use? I'd love to hear about it in the comments!
{Get the look.}
Makeup:
Similar outfit:
When I was in my teens, I used to regularly comb thrift stores and vintage shops for my wardrobe, sift through bags of hand-me-downs from church ladies who were cleaning our their closets... It was born out of necessity; for the most part, the only money I had to work with was the few dollars I'd make here and there by babysitting. (This totally dates me, but this was back when $1 an hour per child was kind of a lot to ask -- or at least in my neighborhood.) However, the more I shopped (often altering the fit with my mom's old sewing machine), the more I developed my own unique style...and I started to really enjoy the way that I could put an outfit together that no one else could possibly copy. (My sisters might argue that no one would WANT to copy it, but that's another story for another day.)
When I first became pregnant with Sparky, and my body started the amazing shape-shifting, my vintage clothing collection got pushed aside for more practical maternity wear. In fact, that's when Greg bought me my sewing machine, and I sewed a bunch of maternity pants and tops for myself (the first time I'd ever sewn fully garments -- start to finish -- on my own without my mom).
Since then, my vintage wardrobe has moved with us -- state to state, internationally -- virtually undisturbed on their hangers. It is only now that I am finally cracking open the closet door to dust off my favorite finds from years ago.
The vintage piece I'm wearing here is a corduroy blazer. I'm amazed that I can finally fasten the button again!
Headband, Goody ~ Blazer, vintage ~ Western Buffalo Check Button-down, OldNavy ~ Jeans, Paige Denim "Pico" ~ Boots, Frye "Billy Vintage Pull-on"
Looking through my old finds reminds me of the treasure hunts I used to conduct through my grandma's closet (indeed, I still have several of the amazing polyester shirts that I scored from her house!)
It totally got washed out by the sun in these pics, but the shirt is a lemony yellow -- I am so in love with yellow this spring!
I'm inspired to start thrifting once again. So often, if I want a new item of clothing, I feel too impatient to actually search for it on the racks of Goodwill, and instead just pick up something brand new (and often devoid of character) at a retail chain shop. (Like OldNavy.) (OK, so pretty much ALWAYS OldNavy.)
But the thrill of finding just that special something, the excitement of the unexpected, the yards of fabric posing as old sheets and tablecloths, begging to be re-purposed as dresses and skirts...ahh for more hours in my day.
I love the look of really dark, intense eye makeup with a clear, ultra shiny lip gloss. If only I wasn't so bad at taking makeup detail shots...
I never made a list of New Year's Resolutions, but who says that we can't just make up some Springtime Resolutions instead? Here we go:
- I will thrift more. As in, at all. (Clothing, fabric, accent furniture, teacups...)
- If I want something brand new, I will attempt to buy from somewhere like ModCloth rather than a soul-less chain.
- I will expand my fabric stash (carefully and with purpose, but yes -- more fabric!)
- I will add a monthly thrifting feature to this blog so that you all can keep me honest (inspired by Dana of MADE).
- I will learn to be a better listener
- I will watch more reality TV. Just kidding. Probably kidding.
So tell me: I know that a lot of you thrift and bargain shop at flea markets and garage sales. What is your very favorite find (clothing, furniture, ceramics, misc.)? What gets the most use? I'd love to hear about it in the comments!
{Get the look.}
Makeup:
Similar outfit:
Monday, March 28, 2011
Whole Wheat Sandwich Bread
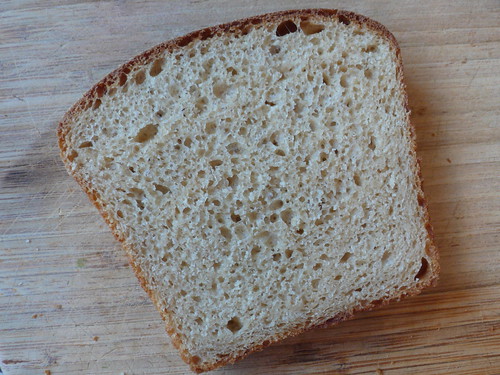
Cooks Illustrated Magazine recently published a recipe for Whole Wheat Sandwich Bread, and I've made it a few times now. It is complex and nuanced, wheaty, slightly sweet, and very wholesome -- in a good way. There are lots of steps, but it's totally worth the payoff.
As I often do with recipes, I have made a few tweaks and changes here and there to streamline the process and tailor the flavor to my family's tastes. I've included step-by-step photos so that this should be doable, even if you've never made bread before.
Note that, while this bread comes together pretty easily, there are two stages and three rises, so be sure to plan accordingly. The Soaker and the sourdough starter (the Biga) must be started either the night before, or early in the morning of the day you intend to bake this. Also, this bread requires either a KitchenAid/stand mixer with a dough hook, or strong arms and a sturdy spoon to mix the dough (although I've never tried it without my trusty KitchenAid).
Whole Wheat Sandwich Bread
Adapted from Cook's Illustrated Magazine
Yield 2 loaves
Biga
2 cups (11 ounces) bread flour
1 cup (8 ounces) warm water (100-110 degrees)
1/2 tsp instant or rapid-rise yeast
Soaker
3 cups (1 lb, 2.2 ounces) whole-wheat flour (use King Arthur White Whole Wheat if possible for a milder "wheat" flavor)
2 cups (16 ounces ) whole milk
Dough
3 tsps. table salt
2 scant tablespoons yeast
1/4 cup honey
1/2 cup unsalted butter, very soft (room temperature/melted)
1/2 cup bread flour
The day before (or early in the morning):
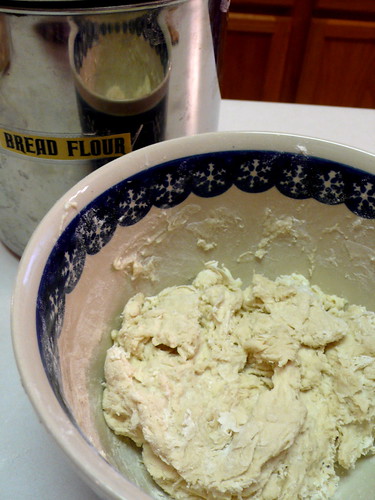
Combine the ingredients in the biga/sourdough starter and mix until no dry spots remain and it forms a rough dough.
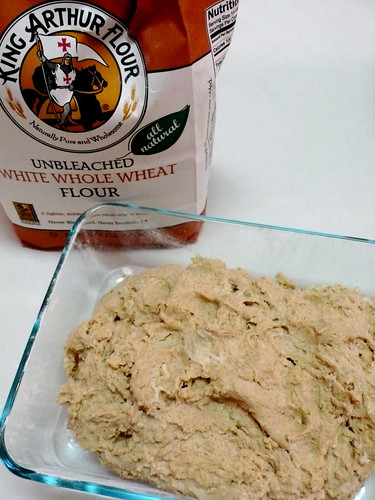
Combine ingredients for the soaker and stir until it becomes a thick dough/paste.
(The bag in the background is what "white whole wheat" looks like. It's not a white flour blend -- it's simply a white colored wheat berry that makes a lighter looking and milder tasting whole wheat flour.)
Cover the biga and soaker (I use a plate on top of each bowl). Place biga on the counter, and the soaker in the refrigerator for 8-24 hours.
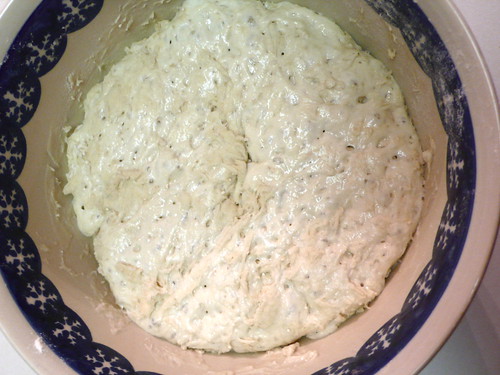
When you are ready to put the dough together, gather your other ingredients, as well as the biga and soaker. Your soaker will have a slightly sour/sulpher smell to it, but don't worry, it's going to taste wonderful once it's all baked. The biga should have gone all bubbly like this:
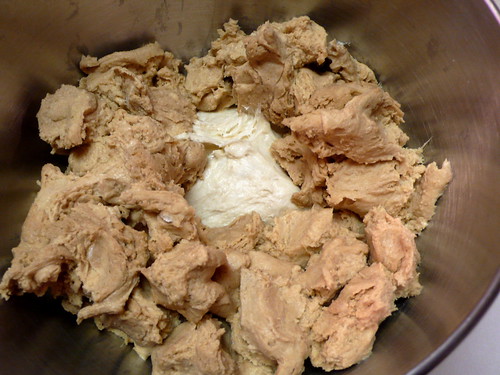
Scrape the biga into a mixing bowl. Break the soaker into smallish pieces and put into the mixing bowl on top of the biga (this helps it mix together much more easily).
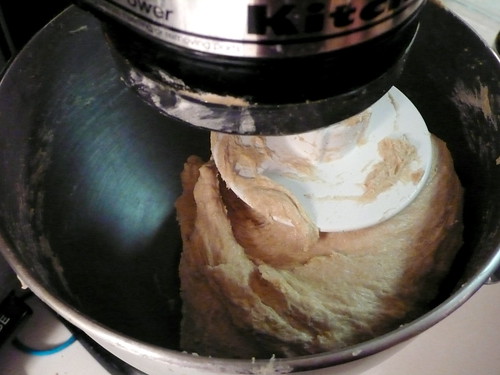
Add the salt, yeast, butter and honey, and, using a stand mixer fitted with a dough hook (or a sturdy spoon), beat the dough on low until it all comes together (about 5 minutes) into a cohesive, sticky mass. Add the 1/2 cup of bread flour, and mix on low for another 5 minutes until the dough pulls away from the sides of the bowl and forms an elastic ball around the hook.
(Yes, my mixer is covered in flour. And no, I did not bother to wipe it down.)
NOTE: if you only want to bake one loaf now and save the other half for later, now is the time to divide it. Cut the dough in half, freeze half of it in a plastic bag, and proceed as follows.
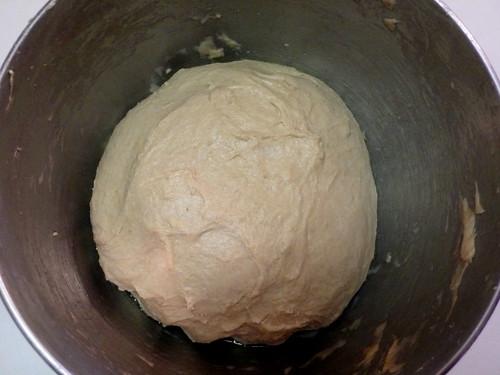
Take the dough out of the bowl to oil it (the bowl). Form dough into a ball by pulling with your fingertips from the bottom of the mass up to the top, like you're stretching a skin over it. Once it is gathered into a ball, place dough back into the oiled bowl.
Cover and let it sit in a warm-ish, draft-free area, until it has doubled in size (sometimes 45 minutes, sometimes 2-1/2 hours.) If your dough won't rise, set your oven to the lowest temperature. Once it has heated up, turn it off, turn your oven light on, and put a pan of steaming water in the bottom. Place your dough bowl (covered) on a rack, and let it rise. (My kitchen was ice-cold this morning, so I had to utilize this little trick.)
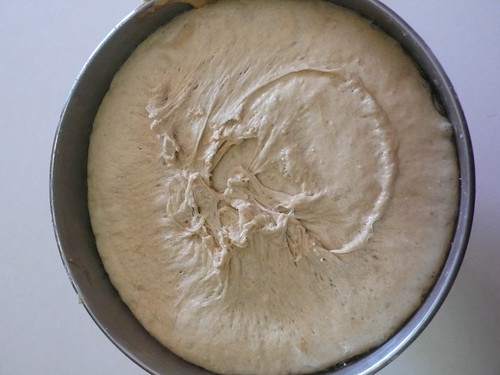
(This was covered with a plate to rise, and the dough rose up to the bottom of the plate, so it bears the marks.)
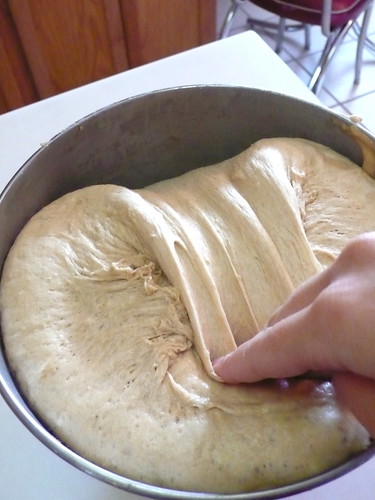
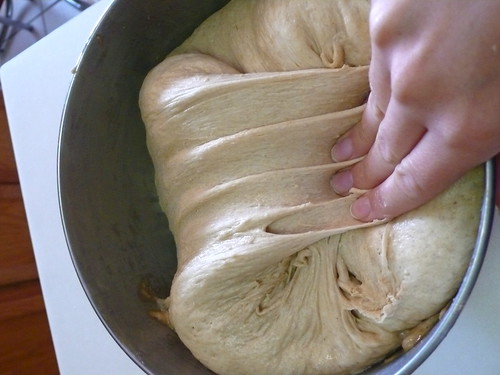
Once the dough has doubled, use your fingers to fold it like this:
Turn the bowl 45 degrees and repeat.
Keep turning the bowl and folding to make a total of 8 folds. Re-cover the bowl, and set aside to rise again (approx. 45 minutes, or until doubled.)
Butter two bread pans.
Tip dough out onto a floured counter and cut in half. Roll one half tightly into a cylinder, tucking the ends under, and place in a buttered bread pan. The dough will be a bit unweildy, but don't worry -- just do your best. Repeat with the remaining half. Preheat your oven to 375 degrees.
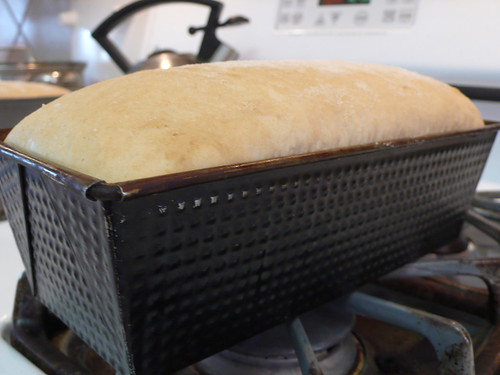
Allow bread to rise, uncovered, for 30 minutes, until it has risen approx. 1 inch above the bread pan. It should look like this:
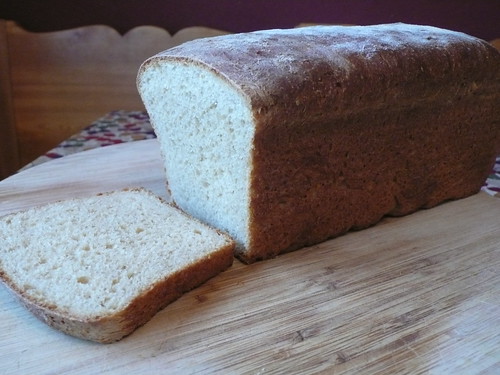
Bake for 35 minutes, or until an instant-read thermometer inserted in the center of the loaf registers at 210 degrees. Immediately tip bread out onto a cooling rack (if bread won't come out easily, let it sit and steam inside pan for about 10 minutes, then try again -- it should come right out.)
Enjoy!
Friday, March 25, 2011
Link-tastic Friday
Three things that have nothing to do with each other.
First: if you reading this from a feed aggregator such as Google Reader, you may not have noticed that I have finally joined the lemmings, and am now on Twitter. I will share blog updates, crafty links that I find, thoughts out of my silly head, and other such things. If you wish to be a part of this mess, follow away! (You can find me @FlashBangFibers) I have just joined this afternoon, so I haven't had anything to say yet, but I'm sure that I will. See you there!
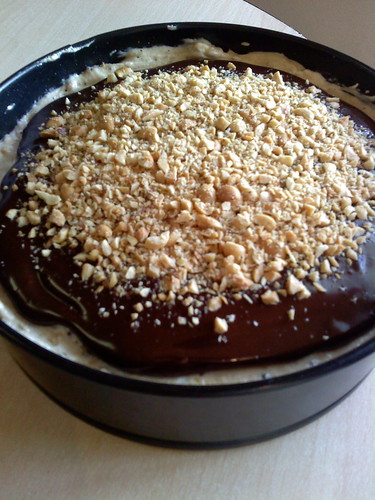
Second: I made this ridiculously decadent Peanut Butter Torte for a night in with a few friends the other night (a recipe from Baking: From My Home To Yours by Dorie Greenspan).
(Sorry, cell phone pic, and it was still in the spring-form pan -- I didn't want to unmold it till I served it, which was after dark, so this was my only shot)
It would have been a better idea if I'd let the whole thing set up for more than 4 hours, because we sort of had to cut really big slices. And we sort of got a little peanut-buttered out. However, the next day I woke refreshed, and in my recovered state, ate a slim piece and was in peanut butter heaven. So beware, this is a recipe to be approached with great care. (Note: I omitted the cinnamon and nutmeg in the peanut crunch part, because I'm not a fan of that combo with peanut butter and chocolate. Other than that, I made the torte as written.)
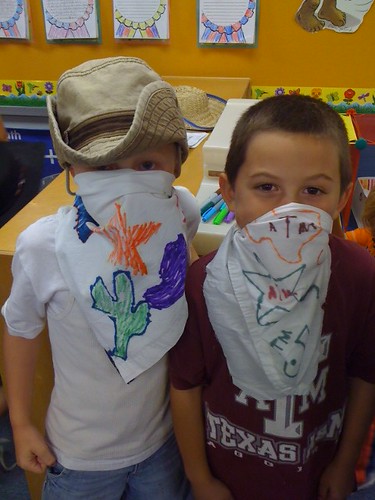
Third: today is National Texas Day! Um, I mean -- our school is celebrating Texas! (Wow, sometimes I get that mixed up. My kids keep telling me "Now that we live in a different land called Texas..." Cracks me up every time.) Anyway, our elementary school has Texas Day once a year, in which they learn about Texas history and do Texas related crafts and activities.

Here is Max (on the left) and his best friend, posing as bandits in the handkerchiefs they made this morning:
The badder they try to look, the more I want to squeeze them and kiss their fuzzy heads.
Link time!!
Looking Fabulous:
Crafty:
Food (savory):
Food (sweet):
First: if you reading this from a feed aggregator such as Google Reader, you may not have noticed that I have finally joined the lemmings, and am now on Twitter. I will share blog updates, crafty links that I find, thoughts out of my silly head, and other such things. If you wish to be a part of this mess, follow away! (You can find me @FlashBangFibers) I have just joined this afternoon, so I haven't had anything to say yet, but I'm sure that I will. See you there!
Second: I made this ridiculously decadent Peanut Butter Torte for a night in with a few friends the other night (a recipe from Baking: From My Home To Yours by Dorie Greenspan).
(Sorry, cell phone pic, and it was still in the spring-form pan -- I didn't want to unmold it till I served it, which was after dark, so this was my only shot)
It would have been a better idea if I'd let the whole thing set up for more than 4 hours, because we sort of had to cut really big slices. And we sort of got a little peanut-buttered out. However, the next day I woke refreshed, and in my recovered state, ate a slim piece and was in peanut butter heaven. So beware, this is a recipe to be approached with great care. (Note: I omitted the cinnamon and nutmeg in the peanut crunch part, because I'm not a fan of that combo with peanut butter and chocolate. Other than that, I made the torte as written.)
Third: today is National Texas Day! Um, I mean -- our school is celebrating Texas! (Wow, sometimes I get that mixed up. My kids keep telling me "Now that we live in a different land called Texas..." Cracks me up every time.) Anyway, our elementary school has Texas Day once a year, in which they learn about Texas history and do Texas related crafts and activities.
Here is Max (on the left) and his best friend, posing as bandits in the handkerchiefs they made this morning:
The badder they try to look, the more I want to squeeze them and kiss their fuzzy heads.
Link time!!
Looking Fabulous:
- Burt's Bees has just released a Tinted Lip Balm. It is free of shimmer and gloss -- it is very simply a lightly flavored berry chapstick with a gentle tint to it. Kind of like a "naturally-you-but-better" sort of a look. I bought the very darkest shade (Red Dahlia), and it gives the most natural whisper of color, so I wouldn't buy any of the lighter ones, but if you're looking for a truly kissable lip tint that's as good for you as it looks, this might be your new favorite! (Not to mention the slick packaging is pretty tempting all on it's own.)
Crafty:
- I would probably still add a bib to this Flattering and Flirty Apron, because I am forever splattering my shirts with the cooking, but it's such a pretty (and customizable) pattern! (Via Whip-up)
- Simple half-square tutorial for whenever I decide to start quilting... (Via Whip-up)
- Sweet, simple creative gift ideas for small children (via Lovely Design).
- Boy project round-up (via Made). Thanks Dana for another great month of Celebrate The Boy!
- Fabric flower round-up\ (via Skip To My Lou).
- This link is sort of food/kind of crafty-ish: New Momma Take-In Tray. A very handy checklist of fun and thoughtful things to include when bringing dinner to a new momma.
Food (savory):
- Baked Curry Sweet Potato Fries I love sweet potatoes no matter how they're made, but I've always struggled to get a perfectly crispy oven-fry. But if Joy The Baker says I can, it must be possible.
Food (sweet):
- Oh my goodness gracious -- Meyer Lemon Clouds via Steamy Kitchen. I actually have some Meyer Lemon juice in my freezer, waiting for their destiny!
- This Sally Lunn Bread with honeyed brown butter spread looks 100% fabulous. I plan to bring it along to the next brunch gathering with friends.
- Butterscotch pudding with caramelized bananas and cream. Send help! (Via Joy The Baker)
- A delightful variation on breakfast --Chocolate Crunch Granola, via Delicious Days.
Thursday, March 24, 2011
Thankful today for the small and for the big
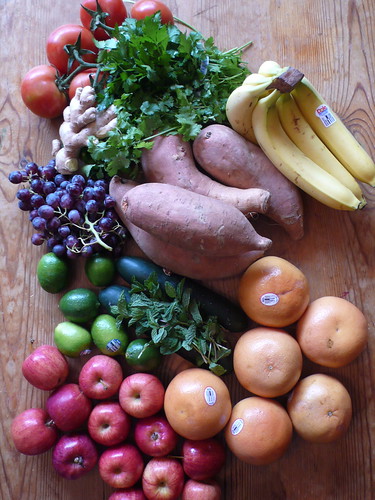
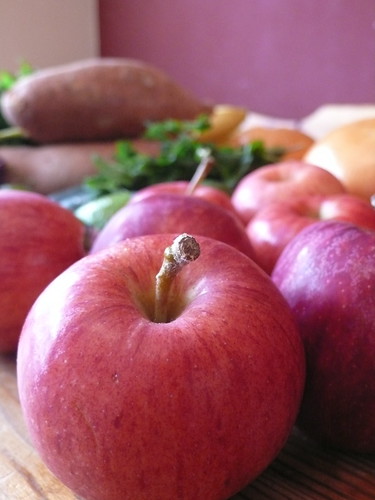
- The beautiful produce that I've just restocked our pantry with.
- Dancing with the stars, which started their 12th season this week. (The children and I watch it on abc.com).
- Our local farmer's market, which opens for the season in less than two weeks (plug the term "farmers market + your city" into a search engine to find out when yours will be opening this year).
- Open windows and fresh breezy air cooling our house in these early days of spring.
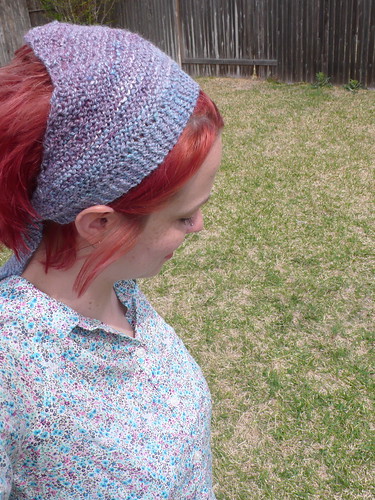
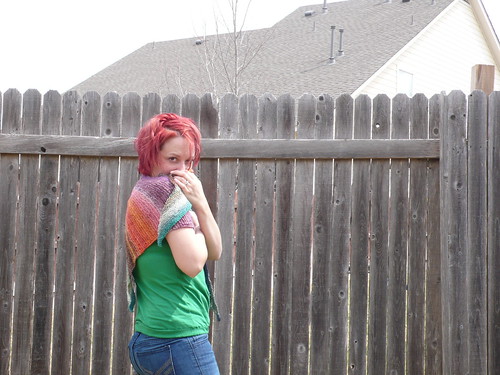
- This kerchief I knit last weekend, which is the perfect cure for a bad hair day (details on my Ravelry project page).
- A community of local friends to share and enjoy life with; the good times and the bad.
- Four beautiful and healthy children, and a faithful husband who loves me.
With all of the stories and images of tragedy and loss coming out of Japan right now, I am more aware than ever that I don't deserve all of the beautiful things that I have, the precious family I call my own, this solid house I live in, my soft bed, the clean water we drink and bathe with. I feel helpless to really make a difference; I cannot physically pull all of the suffering children out of that country and shelter them -- I cannot feed a country. What I can do is notice and appreciate the beauty and the joy I have around me, and be thankful. Infinately thankful.
Wednesday, March 23, 2011
What I Wore Wednesday
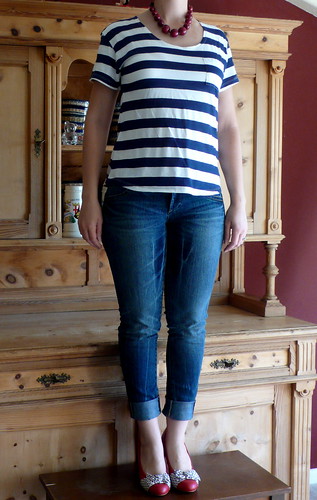
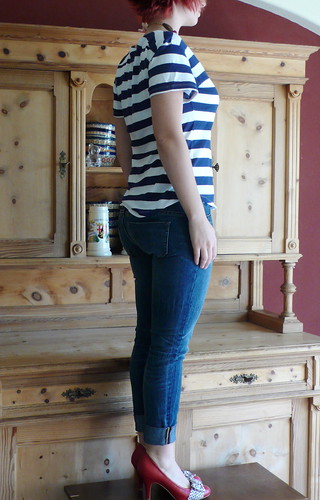
Sometimes I hate stripes. Sometimes I love them. I think you might call that a love/hate relationship. Whateves. Today I love them.
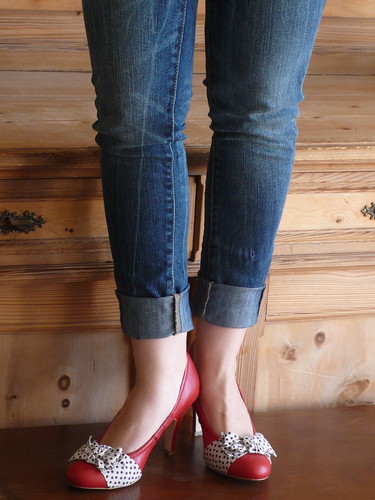
This outfit started with the shoes. Because it's all about the shoes. Also, I spared you the picture of me trying to climb up on this thing, when the camera's self-timer went off just as I realized that I was in heels... You're welcome.
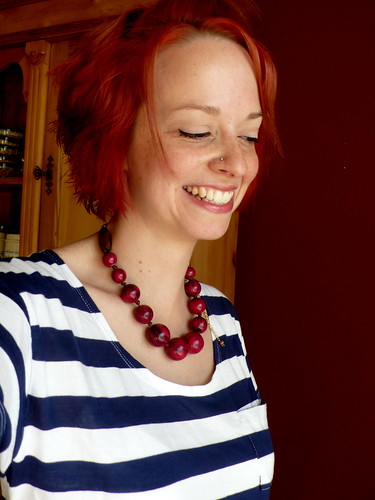
Shirt: Old Navy Woman's Rugby Stripe, Pants: VS Siren in Dark Shadow, Shoes: Bergman Heel (from Modcloth.com), Necklace: Red Wooden Bead from Hannah D's.
In fashion, knitting, crafting, cooking, life: what do you love to hate, or hate to love?
Tuesday, March 22, 2011
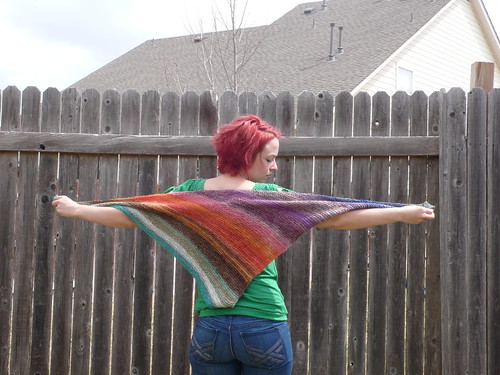
Scrappy Josephine Shawl
In our vacation pictures, I kept showing shots in progress of a shawl that I worked on en route, and now I've got the finished pictures at last. I cast on for this on the way to Florida, knit it during our stay there, and cast off the last stitch towards the end of our drive back home to Texas.
(It actually does have a point at the bottom, but it was such a windy-wild day, so the point got blown under a little in this shot)
This was one of the most mindlessly satisfying things I've worked on in a while. I chose my yarn (a handspun from a Swap For Scraps that I did while living in Germany), chose my needles (a little bigger than might be usually used for this yarn weight to give me the fluid drape I was looking for), and just...knit. No swatching needed! To work this pattern, you very simply cast on 3 stitches, and then add one extra stitch (with a yarn-over) on the same side of every other row. I slipped the first stitch of every row to keep a clean edge. When you are nearly out of yarn, you very simply cast off. The cast off edge is one side of the triangle, so the entire thing appears to have been knit on the diagonal.
The pattern is available for free here.
Ravelry details on my project page.
I would love to know: what's your very favorite mindless knit?
Monday, March 21, 2011
Spring Break
On Friday March 11th, our family got into our van (packed the night before) at 7AM and left for our Spring Break trip to Florida (specific town will remain undisclosed for the privacy of those who live there). Greg had booked a hotel for that night, intending to only drive till dinner time, but we decided to see if we could actually push through. This was our first time driving for such a long distance without a nursing baby or without me being pregnant -- both situations dictate that we have to stop at least every two hours, so we wondered if this time we could finally just DRIVE.
I had packed breakfast food to eat on the road, and then we stopped for lunch to make sandwiches from the cooler and let the children run around. For dinner we stopped at a restaurant and let the children run around again, but other than that, we didn't have to make any stops (limiting water to little sips-as-needed helps a lot with minimizing the bathroom breaks).
In the end we decided to drive the rest of the way there after dinner, so we cancelled the hotel and arrived in Florida at 11:30PM that night.
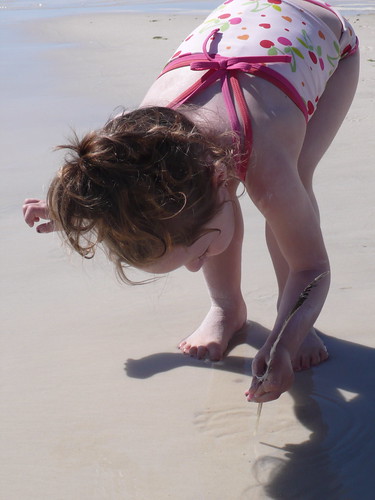
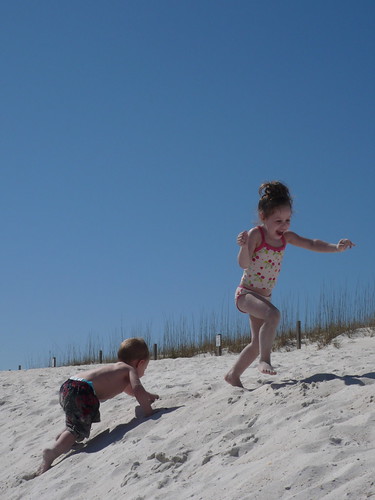
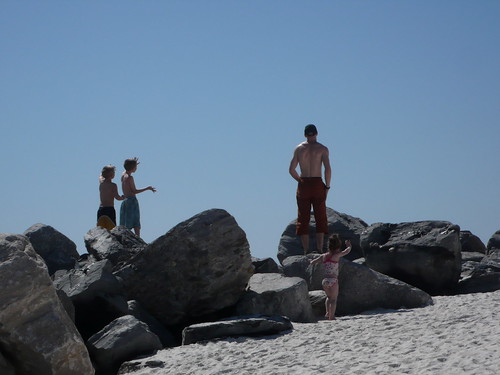
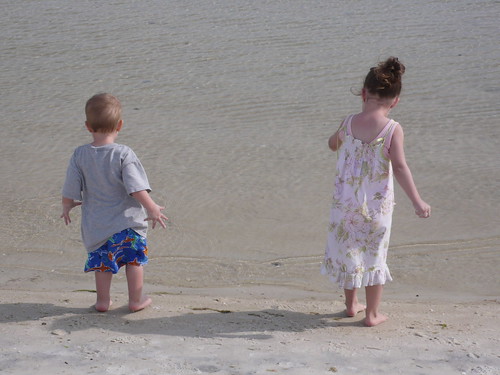
Daisy and Billy had never met Greg's maternal grandparents, so it was good for them to be able to visit, even though Billy was getting over the flu, and is fully into his Challenging Terrifying Two stage. Overall we had a wonderful time, found some fantastic restaurants (thanks to Greg's grandparents, who directed us to all the right places), and got all good and sandy and beached-out.
Waving to airplanes.
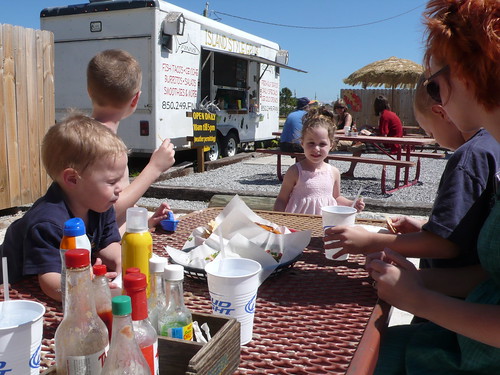
Our favorite meal of the entire trip was here, at Finn taco truck: blackened fish and shrimp tacos, baked sweet potato circles, shrimp ceviche, and chicken and cheese quesadillas.
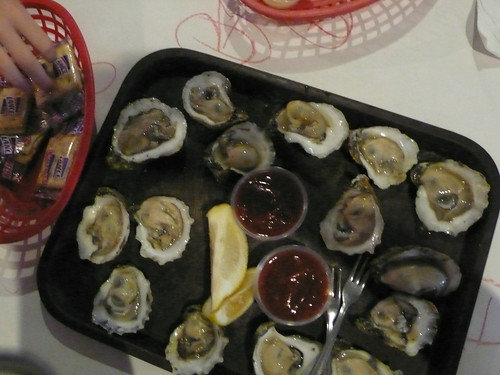
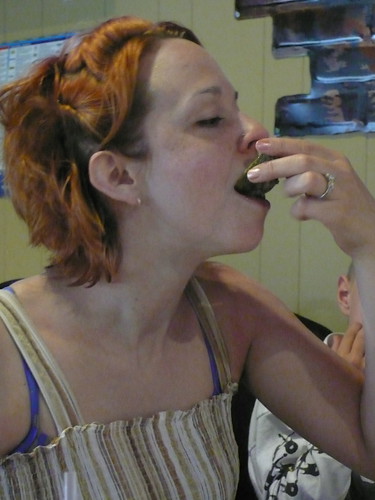
Fresh, raw oysters on the half shell: the best food on earth.
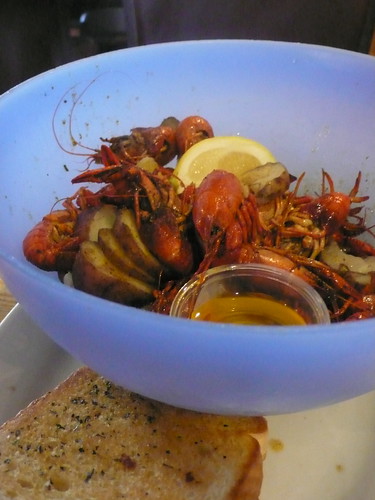
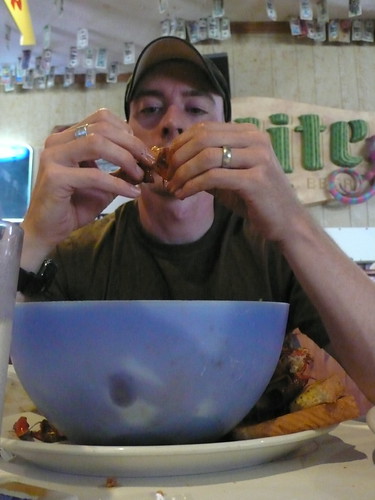
Crawfish boil (sucking out the heads is the very best part).
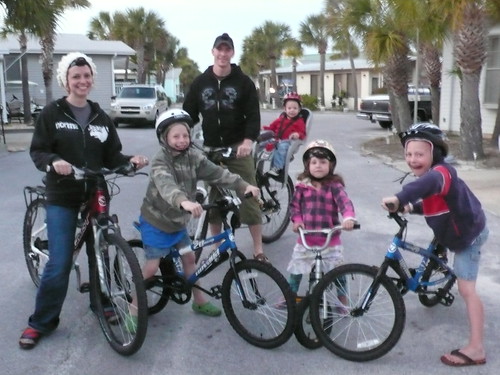
Riding bikes at dusk (Daisy and I are wearing headlamps under her helmet/my hat, because we don't have headlights for all of our bikes).
We drove straight through again on the way home, and even though it felt a little grueling to be in the car for so many hours, it was really nice to not have to unpack into a hotel room, and to crash into our very own beds at the end of the journey.
We had a great time in Florida, and look forward to visiting there again!
For even more pictures of our mini-vacation, click on over to the Flickr set here.
Back to knitting and crafting content tomorrow -- I have two finished things to show you!
Subscribe to:
Posts (Atom)