Showing posts with label food. Show all posts

Wednesday, February 22, 2012

Raw Tacos

I love tacos.  I love them pretty much any way, but usually I make them with about half ground beef and half beans (red or black).  I was skeptical of being able to recreate one of my favorite comfort foods as a raw dish, but I finally took the plunge....and loved them!

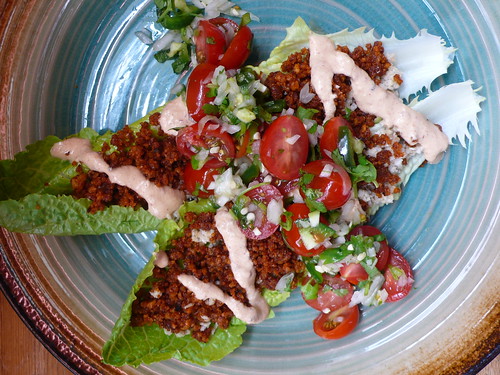
Raw walnut "tacos" with parsnip "rice" and chipotle-cashew "cheese" sauce

Here, I've used raw walnuts mixed with taco seasonings.  For the rice, I modified Ani Phyo's recipe for "Sushi Rice" (from her book: Ani's Raw Food Essentials) using parsnips with a bit of apple cider vinegar and macadamia nuts.  For the Chipotle "Cheese" Sauce, I pureed soaked cashews with a bit of water, lemon juice, a canned chipotle (not raw), and some nutritional yeast to make it "cheesy".  I also threw together a quick Cherry Tomato Salsa/pico de gallo to put over the top.  Served in Romaine lettuce boats, they were delicious, but I look forward to eventually having a dehydrator to make chips or wraps to make it more of a true "taco".  So much fun with raw food!


Raw Walnut "Tacos" with Parsnip "Rice" and Spicy Chipotle "Cheese" Sauce

Serves: 2 people (or at least two people my size.  I had this for lunch two days in a row.)


NOTE: The cashews for the "cheese" sauce need to be soaked 5 or 6 hours (or overnight) before making this, to plan that into your timeline.  If you have a high-speed blender, you might be able to forgo the soak time, but I have not tried this since I have a "regular" KitchenAid blender.

Taco meat
3/4 cup raw walnuts
2 teaspoons chili powder
1 teaspoon cumin
1 tablespoon extra virgin olive oil
1 teaspoon Braggs Liquid Aminos, Nama Shoyu, or soy sauce (not raw)
Salt to taste

Pulse nuts, chili powder and cumin in food processor.  Add olive oil and Braggs and pulse until the nuts are in crumbles and resemble taco meat.  Taste and adjust seasoning as needed.

Rice
1-1/2 cups peeled and diced parsnips (alternately turnips or jicama can be used, although I have not tried either -- if you use jicama you will probably have to squeeze it out [after processing it] with cheese cloth, through a strainer, or with a nutmilk bag to get rid of some excess moisture before adding seasoning)
1/2 cup macadamia (or pine nuts, sunflower seeds, etc.)
1/4 teaspoon salt
2 teaspoons apple cider vinegar

Combine parsnips, macadamia nuts and salt in food processor.  Pulse into rice sized fluffy bits.  Add vinegar and pulse one or two more times to combine.

Spicy Chipotle Cheese Sauce
1/2 cup cashews
2 tablespoons fresh lemon juice
2 tablespoons water (or as needed)
1 canned chipotle chili (to make this completely raw, soak 1 dried chipotle in water at room temperature for 1 hour.  Reserve soaking water and use in place of the 2 tablespoons of water in this recipe)
1/4 cup nutritional yeast (or as needed for "cheesiness")

Soak cashews for 5-6 hours or overnight.  Drain and add to blender along with lemon juice, water, and chipotle chili.  Blend until the sauce has become creamy (you may have to stop the blender several times to scrape down the sides, but keep at it -- it will all come together!)  Add water as needed.  Once it has become a creamy sauce, add nutritional yeast and blend to combine.  Taste and add salt and/or more yeast to taste.  If you are chilling this to use later, it will thicken up considerably.  I added a little water to the amount I intended to eat when I was ready to use it so that I could make an attractive "drizzle".  This is also delicious left thick and used as a dip for crudités.

Cherry Tomato Pico De Gallo
1/4 cup cherry tomatoes sliced in half
1/4 cup finely chopped red onion (or white or yellow or scallions....)
1/4 cup chopped cilantro
chopped fresh jalapeno to taste
salt to taste
cubed 1/4 of an avocado (optional)

Combine all in a small bowl.

Arrange your meal on large Romaine lettuce leaves.  Enjoy!

Raw walnut "tacos" with parsnip "rice" and chipotle-cashew "cheese" sauce

Tuesday, May 11, 2010

Super simple handmade Greek Yogurt

I've been wanting to make yogurt for a few years now, but it's always kind of intimidated me.  I thought that there was all sorts of (probably expensive) equipment needed, that I'd have to mail-order a special yogurt culture starter, etc., and all of my online research verified this.  It was going to be an expensive and daunting task, so I put it off and kind of forgot about it.

A few days ago, I found the recipe for a very simple version of homemade yogurt on the blog JCasa. It uses only two ingredients, and if you own a pot, you have all of the equipment that you need.  Encouraged, I decided to take the plunge, and -- it worked!  The following is my slightly streamlined version of the already very simple recipe found there.


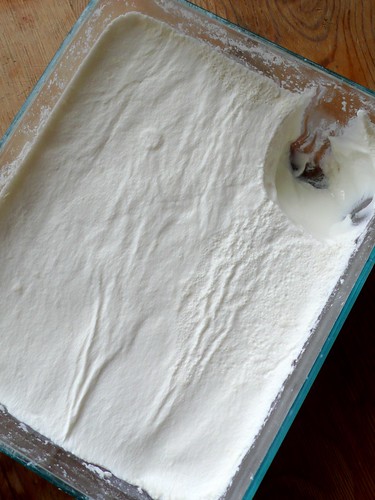
Thick, creamy Greek Yogurt -- oh my!


For the lactose intolerant among you, I've been told that you can culture this for 24 hours instead of the 8 I have here, and the yogurt culture digests all of the lactose for you, rendering it safe.  I haven't tried this yet, so tell me if you do!


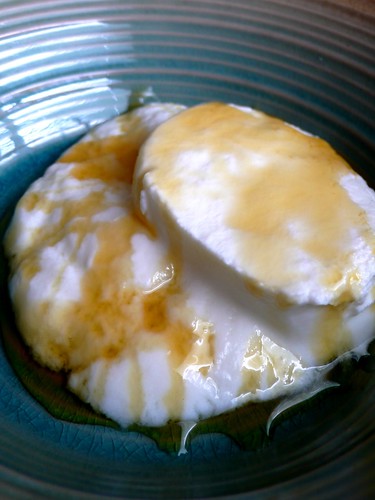
Generously drizzled with Lyle's Golden Syrup

One last note -- not only is this stuff delicious and crazy simple to make, but it's also cheaper than buying yogurt at the store.  Yogurt generally costs 50 to 80 cents for 6 to 8 oz (regular or organic).  This, on the other hand, worked out to about 45 cents when using organic milk.  You could make it even more cheaply if you used regular milk -- or even powdered milk if your budget is really tight.)  I plan to try this next week with raw milk from the local dairy for cream-on-top yogurt.

Greek Yogurt
(Adapted from JCasa)

Ingredients:
1/2 gallon milk
6 or 8 oz of plain yogurt

Pour all of the milk into a large pot.  Do not cover, because if you do, it will most likely boil over before you notice it.  Bring your milk just up to a simmer (a skin should form), but do not boil.  Allow to cool down to the point where you can stick your finger in for a 10-count, before it begins to burn you (for those of you who feel they just HAVE to use a thermometer, you're aiming for about 116°).  This will take at least 20 minutes in a warm-ish kitchen.

Dump the yogurt in and whisk thoroughly to incorperate.  Pour the mixture into a large lidded glass or plastic bowl, cover, and wrap in 5 or 6 kitchen dish-towels.  Set out on the counter overnight or for 8 hours.

Check to see that it has "set".  If it looks like yogurt, congratulations!  Success!!  If you want it to be greek yogurt, pour your new yogurt into a sieve that has been lined with two layers of cheesecloth, and set over a bowl.  Allow to drain for several hours in the refrigerator until it is as firm and creamy as you wish.  Turn your yogurt back out into the bowl and seal with a lid to store in the refrigerator.  (Alternately, lay paper towels over the surface of the yogurt to absorb the liquid, and change them out frequently until the yogurt firms up the way you want it.)


Be sure to save 1 cup of plain yogurt as the starter for your next batch.

Sprinkle with granola, stir jam into it, dress it with maple syrup, honey, Lyle's Golden Syrup, or dollop a spoonful plain into some spicy indian curry.  Alternately, you can add some vanilla extract and sugar or other sweetener to the entire bowl and mix well.


This yogurt has been 100% Daisy Approved


Truly, I cannot believe how easy this was to make.  So what are you waiting for?  Go make some yourself!

Saturday, March 22, 2008

Curry Powder

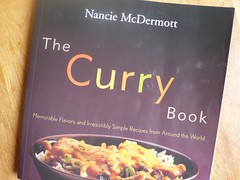
A few years ago, my sister Hannah gave me this book for my birthday:

It is an unassuming, square volume, entirely black and white on the inside with no pictures. The gem of this book is in the text. Not only does it contain good, solid recipes, but it also gives you the tools to experiment and create your own curry dishes.

Although the author assures the reader that using store-bought curry powders and paste will be fine in any of the dishes, she includes several curry powder recipes, as well as curry pastes and Garam Masala.

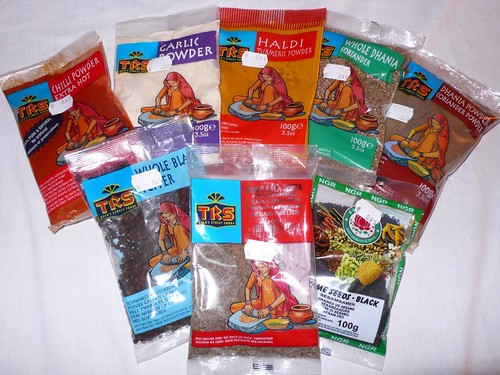
I've been wanting to try out the curry powder recipe for a while now. Two weeks ago I ran out of my store-bought McCormicks blend, so after a quick run to the Asian food store, I was ready.

All of this only cost me about 10 Euro -- I don't know why anyone would buy their spices anywhere else!

One benefit of making your own is that you can tailor it perfectly to your own taste -- and even if you follow the recipe exactly, there's nothing like the freshness of a newly ground spice blend.

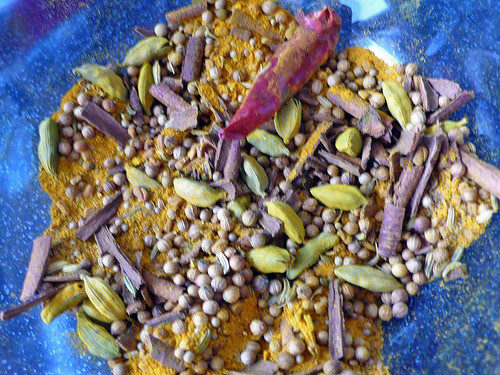
Here are the toasted whole and untoasted ground spices all together in a bowl:


Curry Powder
(from The Curry Book by Nancie McDermott)
You can vary any of these proportions, omit a few, or add any of the following: fennel seeds, start anise, ground nutmeg, mace, dried curry leaves, brown or black mustard seeds. You can substitute ground spices, but keep in mind that they burn quickly and need to be toasted separately from any whole ones you may be using (which will take longer to darken)

1/4 cup coriander seeds
2 T cumin seeds
1 T white or black peppercorns
2 tsp fenugreek seeds
2 cinnamon sticks, approx 3 inches long each
1 T ground turmeric
2 tsp whole cardamom (about 3 or 4 pods) or ground
1 tsp whole cloves
1 tsp ground ginger
1 dried red chili pepper, stemmed a broken in pieces (or 2 tsp crushed red pepper, or 1/4 tsp ground cayenne pepper)


Preheat oven to 300 deg F.

In pie tin (I used a large jelly-roll pan), combine coriander, cumin, peppercorns and fenugreek. Wrap cinnamon sticks in a kitchen towel (preferably a smooth one rather than one with a nap, like terrycloth) and bash them with a rolling pin or the side of an unopened can. Add crushed cinnamon to pan of spices and put in oven.

Toast spices for 15 minutes, stirring once, until they darken a little and release their flavors. Remove from the oven and spread out on a plate to cool to room temperature.

In a small bowl, combine turmeric, cardamom, cloves, ginger and chili pepper or cayenne. When the toasted spices have cooled, combine with untoasted spices and grind to a fine powder in a spice grinder (I have a coffee grinder that I use only for spices), or a mortar and pestle. Pour all into an airtight jar (I taped a piece of paper into a funnel), and store away from heat and light. For maximum freshness and flavor, use within 3 months.


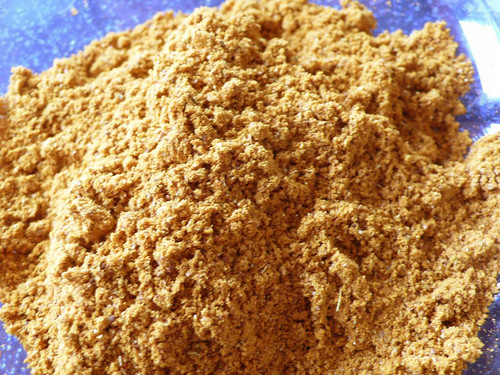
Fragrant, fresh curry powder, all ground up and ready to use.

Have a great Easter, everyone!

Blogged with Flock

Saturday, March 15, 2008

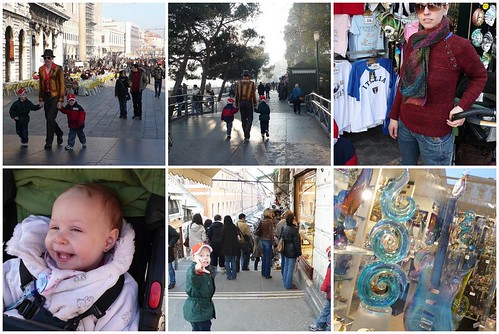
Italy Part 9: Venice

On the last day of our Italy trip, we spent the day in Venice.

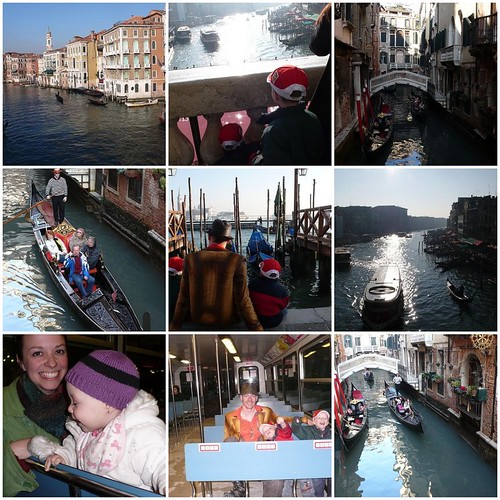
The city is built on 110 little islands in a salt water lagoon. Travel is restricted entirely to boating or walking -- no cars are allowed in the city at all. Venice is known as the largest urban car free area in Europe.

We parked near the dock, and took the traghetti (waterbus) in.

Once inside the city, the water is full of Gondolas giving high-priced rides to tourists, as well as Venitians boating about doing their every day errands. (For example, if you dig a hole, you then have to boat the dirt out somewhere. So strange.)

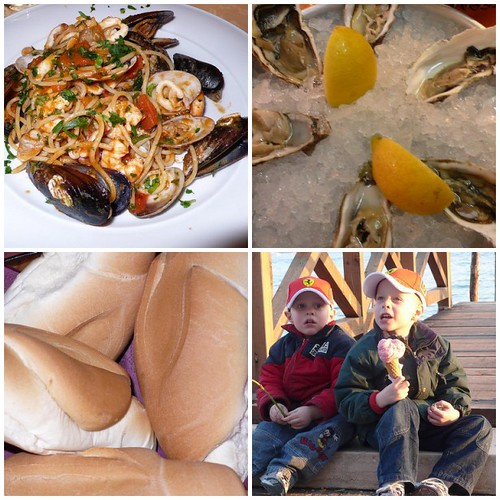
We, of course, had to eat seafood while we were there. I ate my favorite food -- raw oysters. Everything we had, unfortunately, was incredibly overpriced, because we were not able to get beyond the very touristy area during our short visit. (Although the seafood was very fresh and good. The vegetables though...hm. Not so much.)

The bread of Venice, as well as the olive oil, is remarkably bad (the bread pale and spongy and the oil smelling...well, just not good), and was especially a let down after what we had become accustomed to in Florence. From what I hear, their Jewish bread (from the Jewish ghetto or district) is delicious, but it always sells out at the bakeries by lunch-time, so at dinner there's almost no chance of it. Oh well.

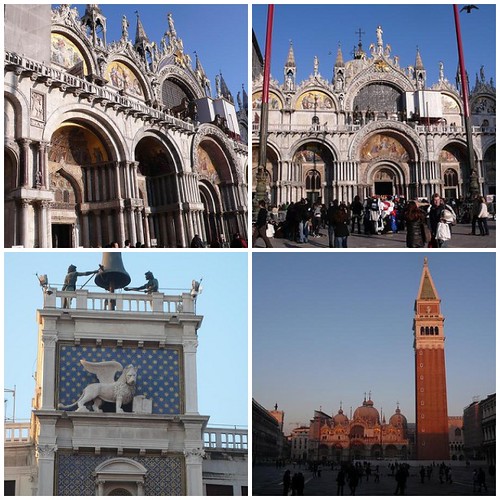
The architecture was very beautiful, and we definitely want to go back to explore more. The top two pictures below are of San Marco square.


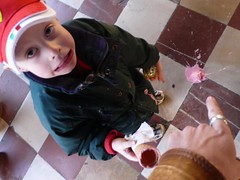
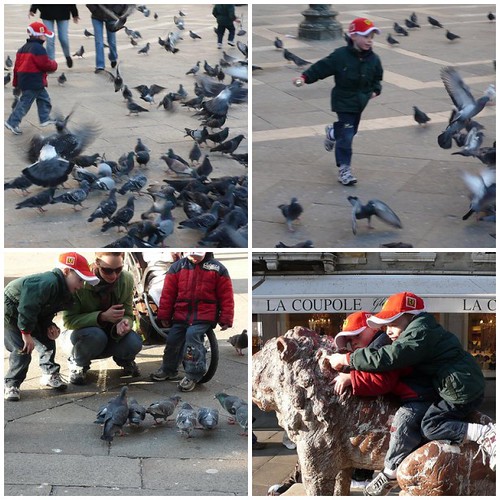
Unfortunately, the whole place is over run by pigeons, and this is totally played up, complete with little stands selling cones of pigeon food to feed to the hoards of birds (we contributed to the problem with two dropped ice cream cones).


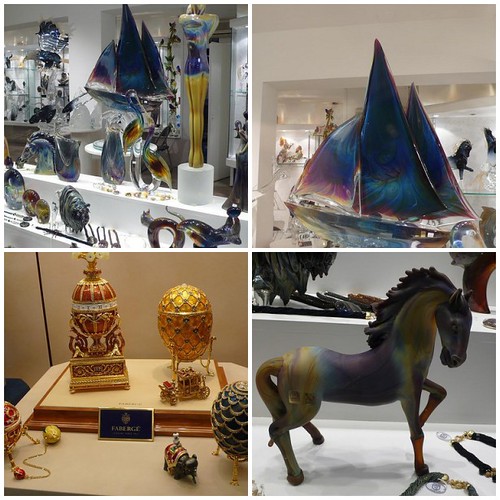
The shopping is extensive, strongly featuring beautiful, artistically handmade Murano glass in countless shop windows.


The entire city feels magical. It was a lot of fun just to walk around and take in the sites. It did get pretty cold as night fell, and we did not manage to get beyond the touristy bits, but we took with us some lovely memories.


One funny fact: as we were looking around for a place to eat dinner, I noticed a heart and cupid on one of the menus in a restaurant window. I turned to Greg: "Hey, what day is today?"
"Ummm...February 14th."
(joking) "Wow! So you took me to Venice for Valentine's day!"
"That's today?!"
Neither of us had any idea until that moment. Whoops! What hopeless romantics we are. :)

Sunday, March 09, 2008

Italy Part 6: Piazza Santo Spirito Flea Market

On the second Sunday of every month, a flea market is set up in the Piazza by the Santa Spirito. A fascinating mish-mash of the good, the ugly, the delicious and the seemingly useless all gather into one place for the local and tourist alike to peruse at leisure.


The entire place is packed with sellers and shoppers, all looking to score the perfect deal, or turn over some old, neglected treasure.

Diver's helmet, anyone?


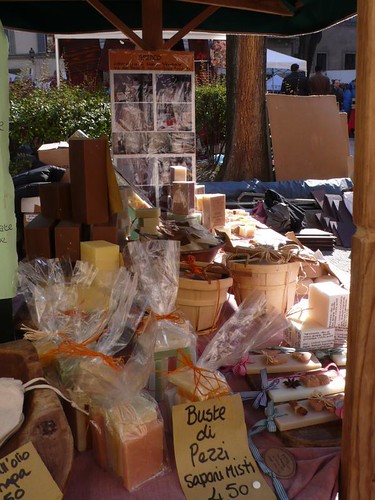
I have a serious weakness for handmade, hand-cut soaps. There's something just so perfect about their less than perfect edges, their somtimes craggy exteriers, and their alluring herbal fragrances. The only problem is, I am in love with the experience of being surrounded by tables of it. This is clearly not practical, and so, in lieu of buying the whole booth, I moved on empty-handed.


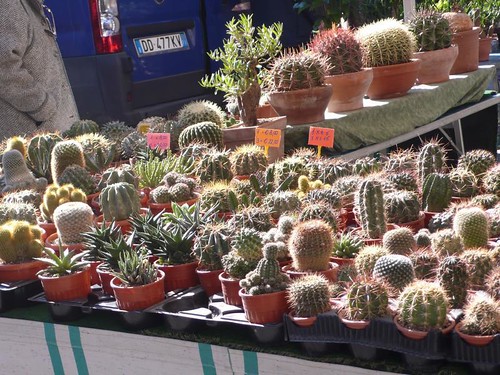
I was truly surprised at some of the things that were up for sale. Is there really that much of a demand for miniature cacti?


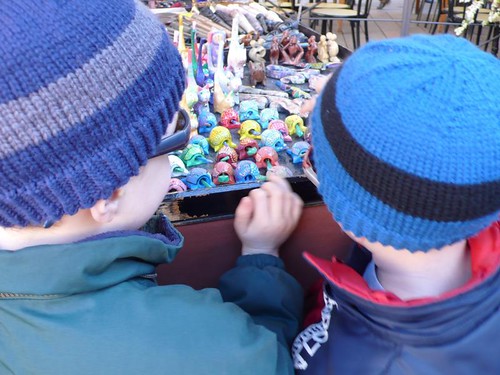
During our long car trip to Italy, I managed to knit (or finish up) three hats and three pairs of mittens for my little ones. On days like this, they proved to be just the thing for blocking out the chill while enjoying time outside.


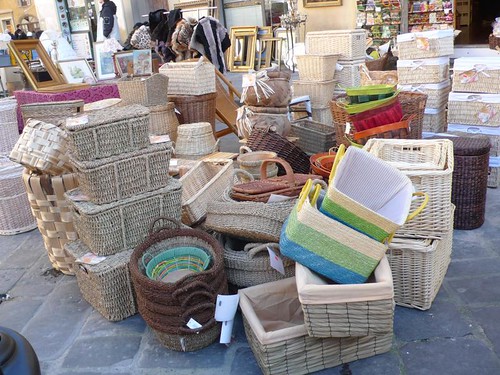
I love baskets, but unfortunately, we were packed to our eyeballs in the car with no room to even think about picking up a few of these.


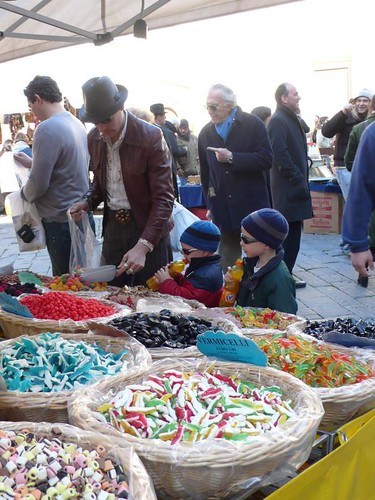
The selection of dried fruit and candy at this stall was rather extensive.


We stopped to have a snack and played around the fountain:


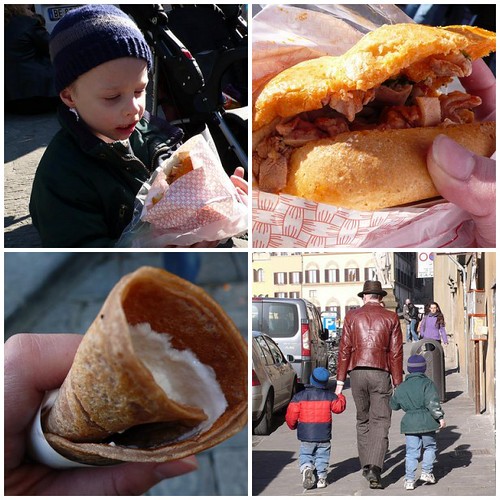
Then we ate a fine lunch of beef intestine sandwiches (Lamprodotto) and thick chestnut crepes filled with fresh ricotta (Necci con Ricotta), before we headed back to the hotel for a much needed nap.


Check out these pictures and more in the photoset: Piazza Santo Spirito Flea Market

Next post: Famous leaning tower.

Blogged with Floc

Wednesday, November 21, 2007

Finnish Cardamom Braid

Edited to add photo:
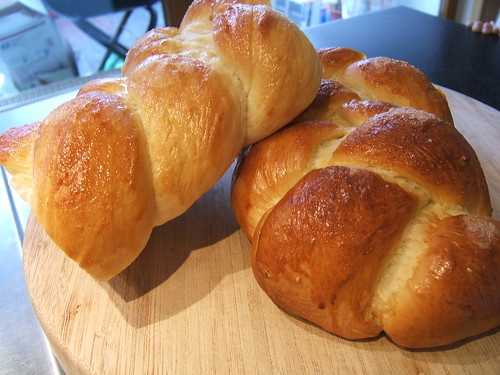
DSCF8765

Here's the bread that I'll be baking tomorrow (I'll add a photo when I get a chance). Recipe is from Taste Of Home magazine, and I've tweaked it just a tiny bit.


Finnish Cardamom Braids

2 pkgs.(1/4 oz each) active dry yeast
1/4 cup warm water(110-115 deg)
2 cups warm milk(110-115 deg.)
3/4 cup sugar
1/2 cup butter or margarine, softened
1 1/2 tsp. salt
3/4 tsp. ground cardamom
2 eggs
1 Tablespoons Vital Wheat Gluten
7 to 8 cups all puirpose flour

In a mixing bowl, dissolve yeast in warm water. Add milk, sugar, butter, salt, cardamom, eggs, Vital Wheat Gluten, and 3 cups flour. Beat until smooth. Stir in enough remaining flour to form a soft dough. Turn onto a floured surface. Knead until smooth and elastic, about 6-8 minutes. Place in a greased bowl, turning once to grease top. Cover and let rise in a warm place until doubled, about 1 hour. Punch dough down. Turn onto a lightly floured surface, divide in half. Divide each half into thirds. Shape each piece into a 13-in. rope. Place 3 ropes on a greased or parchment paper covered baking sheet. Braid ropes, pinch ends to seal and tuck under. Repeat with remaining dough. Cover and let rise until doubled, about 45 minutes.

After loaves have risen, before baking, I paint them with mixture of:
1 beaten egg
2 Tablespoons milk

Sprinkle librally with granulated sugar.
Bake at 350 deg. for 25-30 minutes or until golden brown. Remove from pans to wire racks to cool.

Yield: 2 loaves.

Note: if possible, after braiding loaves, place on parchment covered baking sheets. When pre-heating oven, put two baking stones in for 20 minutes to heat through. Slide loaves on parchment off of baking sheets on to baking stones and bake as directed. This adds to the great texture of the bread.

Stuffed Beef Tenderloin

Main course for our Thanksgiving dinnner tomorrow.

Recipe from Taste Of Home magazine February/March 2002

Stuffed Beef Tenderloin

Serving Size : 12

1 cup olive or vegetable oil
2 tablespoons Worcestershire sauce
1 teaspoon each dried oregano, basil and thyme
1 teaspoon garlic salt
1 teaspoon salt
1/2 teaspoon pepper
1 (3- to 4-pound) whole beef tenderloin -- trimmed
Stuffing:
2 cups sliced fresh mushrooms
1/2 cup sliced green onions
1 (8-ounce) can water chestnuts -- drained and chopped
1/2 cup butter or margarine
2 cups seasoned bread crumbs
3/4 cup egg substitute
1/4 cup grated Parmesan cheese
1/2 teaspoon dried oregano
1/2 teaspoon dried rosemary -- crushed
1 teaspoon fennel seed
1/2 teaspoon pepper

In a large resealable bag, combine the oil, Worcestershire sauce and seasonings. Make a lengthwise slit about three-fourths of the way through the tenderloin. Place in bag; seal and turn to coat. Refrigerate for 4 hours or overnight. In a skillet, saute mushrooms, onions and water chestnuts in butter until onion is tender. Remove from heat. Add remaining stuffing ingredients; mix well. Discard marinade. Open tenderloin; spoon stuffing on one side. Close and tie with kitchen string. Place in a greased shallow roasting pan. Bake, uncovered, at 350' for 1-1/2 hours or until meat reaches desired doneness (for rare, a meat thermometer should read 140'; medium, 160'; well-done, 170'). Let stand 10-15 minutes before removing string and slicing.

Tuesday, November 20, 2007

Paris!

Yes, we did visit Paris about two months ago, and have been to The States since, but no time like the present to catch up, yes? (By the way, we did manage to return safely to Germany this past weekend, and I'll post pics of our trip..um...later. Right.)

Note: all collages are clickable and will take you to their respective albums.
Paris. This was one of the coolest places we've been yet, I think. The top two pictures in the collage below are from a stop we took at the side of the road for the little guys to stretch their legs and Daisy to eat. Mr. Fiberflash always knows how to make things fun for everyone, no matter where we are. (The boys are actually running on a deserted farm road that ran parallel to the road we were driving on, which was on the other side of the hedge.)

Bottom left, you can see the "roller cops". Would be interesting to be accosted by one of these dudes.

At bottom right, Sparky looks over the whole of Paris from the grounds of the Sacre Coeur.
Paris Misc.


The science museum was great! For the children, we had to buy a ticket for a 90-minute session of age-appropriate play and discovery. It was so cool. There's way too much to point out things in each shot, so here's an overview:
Paris Museum


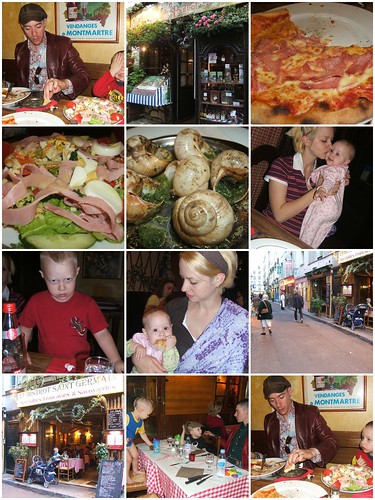
The food. As expected, food in Paris was lovely. We weren't looking for the fancy super high-end places that give you "bites" of food teased into little towers on gilt-edged plates. Instead we wanted the people's food, things we could sink our teeth into, get our hands dirty.

Bottom row: a diaper incident led to Max eating his dinner pants-less and proud.
Paris Eating


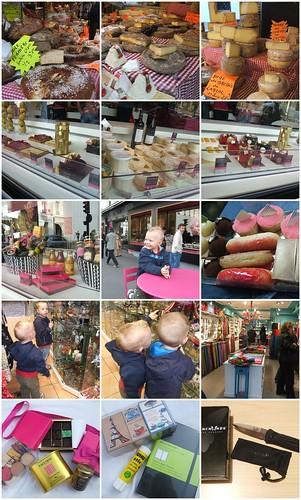
Top row (of collage below) is from an open-air market we came across. The breads, cheeses and cured meats were uncovered and just out there on the displays. So unsanitary! So utterly delectable!

Second and third rows are of a place called Fauchon. Now, I did just say that we were not in search of high end food. I must admit, however, that we were in search of high end chocolate. Fauchon is also a patisserie. It was an incredible place, and is recognized as one of the finest of chocolatiers. We were prohibited from taking pictures inside, so instead I went all around the outside and took shots of each of their display windows (!). (Really though, click on the Fauchon link -- you can buy their chocolates online too!!)

Bottom row is some souvenirs. I don't think I have to specify who got what of those last two. Not included in these pictures is a watercolor print of the Awful Tower (as the boys called it), which we hung in their room, and they love.
Paris Shopping


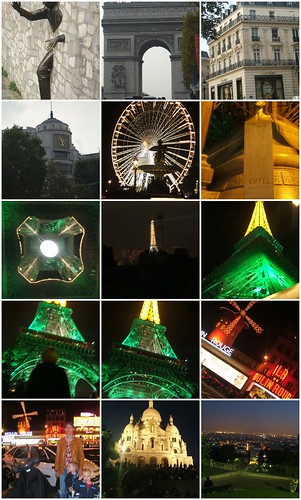
Here are some shots of just general sightseeing. The top left corner was of a random bronze statue of a man coming out of a wall. No explanation to it's significance, and the boys were a bit disturbed by it, but we thought that it was pretty cool. The picture immediately below it is of the Cartier flagship store, located on the broad, beautiful "avenue des Champs-Elysees", lined with other flagship stores like Gucci, Vuitton and Cavalli (just to name a few).

Third and most of fourth row are, of course, the Eiffel Tower. I never knew why it was there or what it was for. Now I do, but if you want to know, you'll have to read about it for yourself. It's pretty interesting, and not at all what I thought. (Well, actually, I don't know that I thought anything about it 'till I saw it in real life.) The image copyright portion of the Wikipedia article, however, just completely make me see red (if you click on that link above, click on number 7 in the contents box).

Bottom row: Moulin Rouge, Sacre Coeur, and a view of Paris from the Sacre Coeur grounds.
Paris Sights


We didn't go up into the Eiffel Tower, and we didn't plan to. There's no way that I'm going to wake up early to stand in line for hours to go up to the top of a tower -- especially when I can see it some other way. Through the use of a great guide book and some direction from a message board I'm part of, we felt like we got a great slice of the essence of Paris, and someday hope to return after the Mr. retires to explore it fully.

One of my favorite things about traveling with Mr. Fiberflash is that he makes it a point to take time to make sure each person has fun, from the smallest to the tallest. When we're plotting our journies, he always researches things that will be interesting to each one of us, not just things that he thinks would be cool. Because of that style of planning, the trip to Paris was a great success for all of us, and even the boys have great memories that they still talk about.

LinkWithin

Related Posts Plugin for WordPress, Blogger...